9. Lesson 9
9.1. Introduction
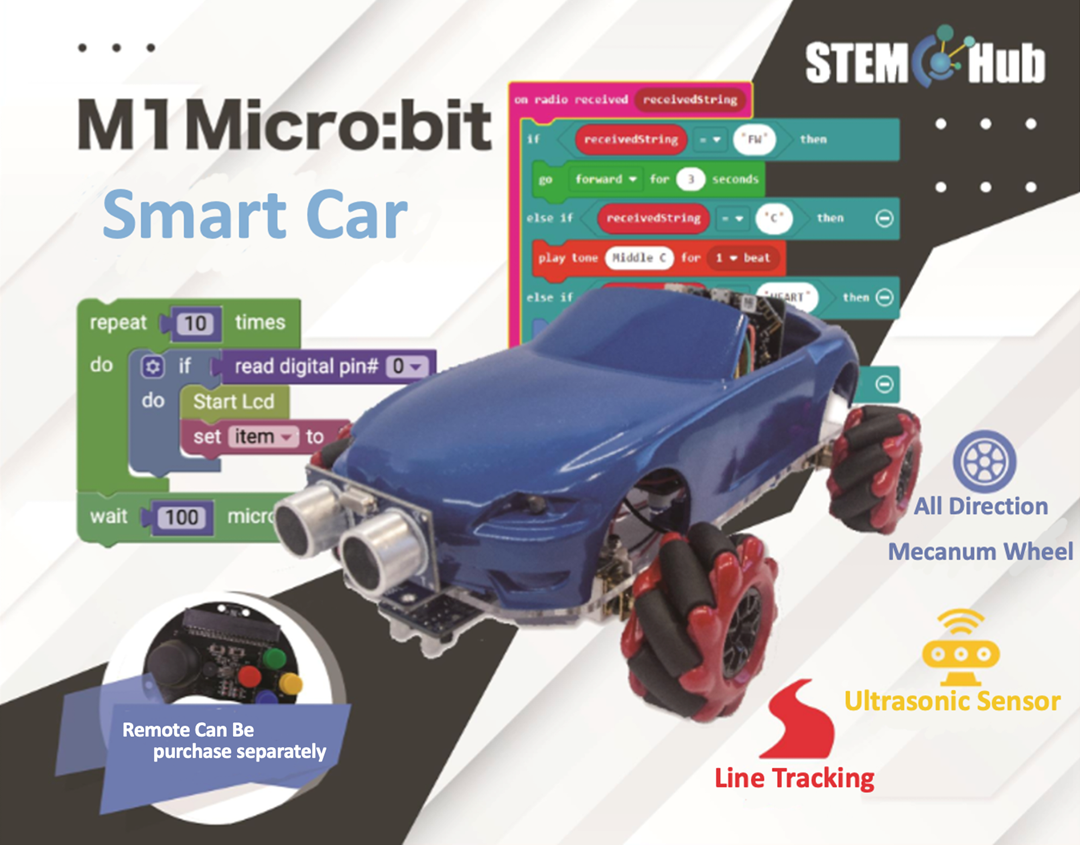
Welcome to Micro:bit Smart Car tutorial! In this course, we will explore Micro:bit and learn how to develop Micro:bit Smart Car by programming
9.2. Learning Target
Let students clearly understand Micro:bit Smart Car’s extension tools and its functions, moreover, understanding its install and block coding method
9.3. Liftable clip
Just like the robotic arms in science fiction films and factories, the clips equipped with the lifting bracket can realize the lifting function, work at different heights.
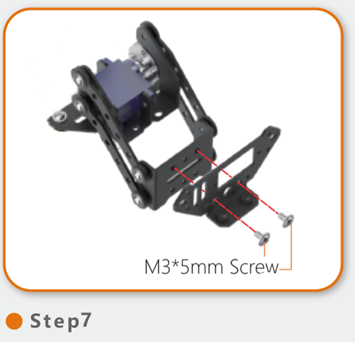
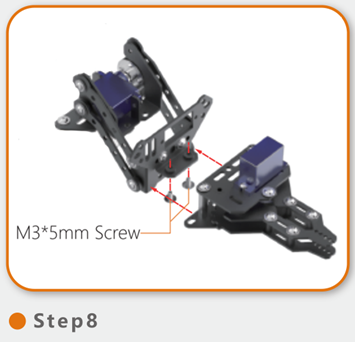
9.3.1. To install the lift bracket
You can refer to steps 1 - 6 of the first lesson to install the mechanical fork
9.3.2. To attach the clip to the lift bracket
9.4. Exercise 1
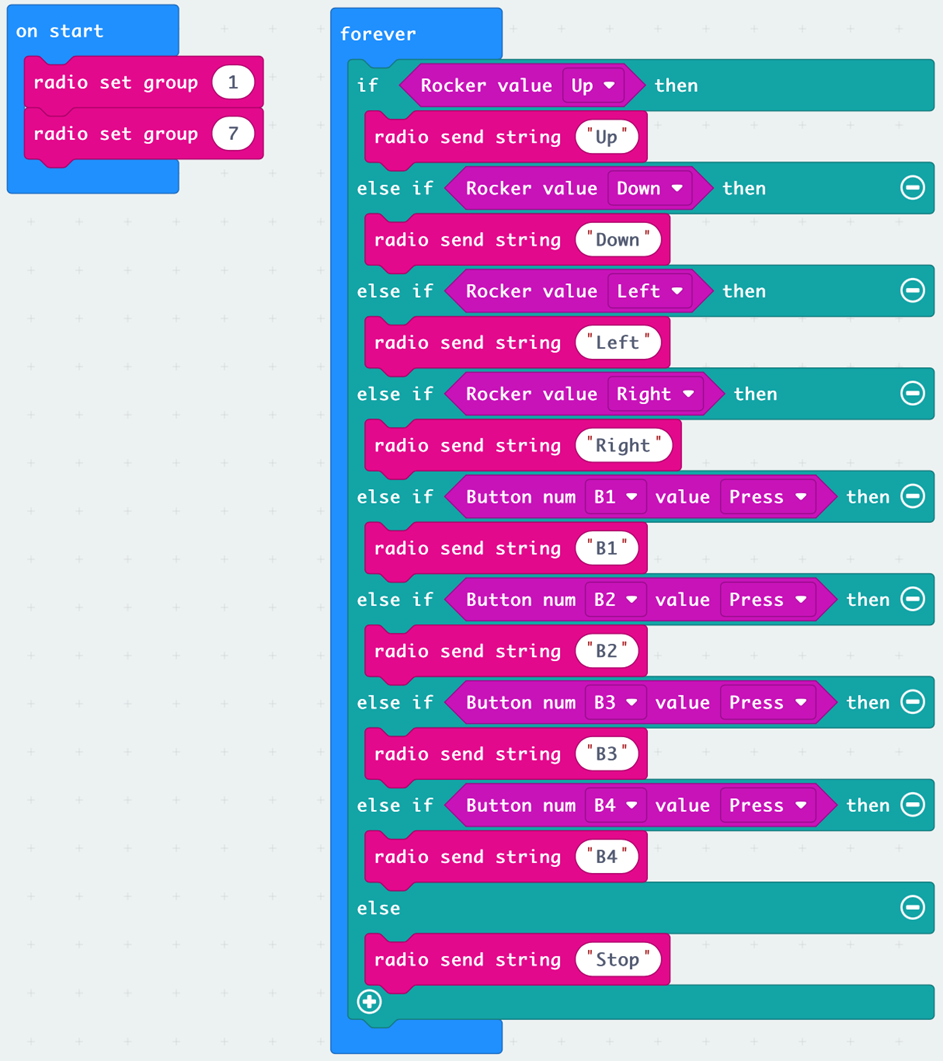
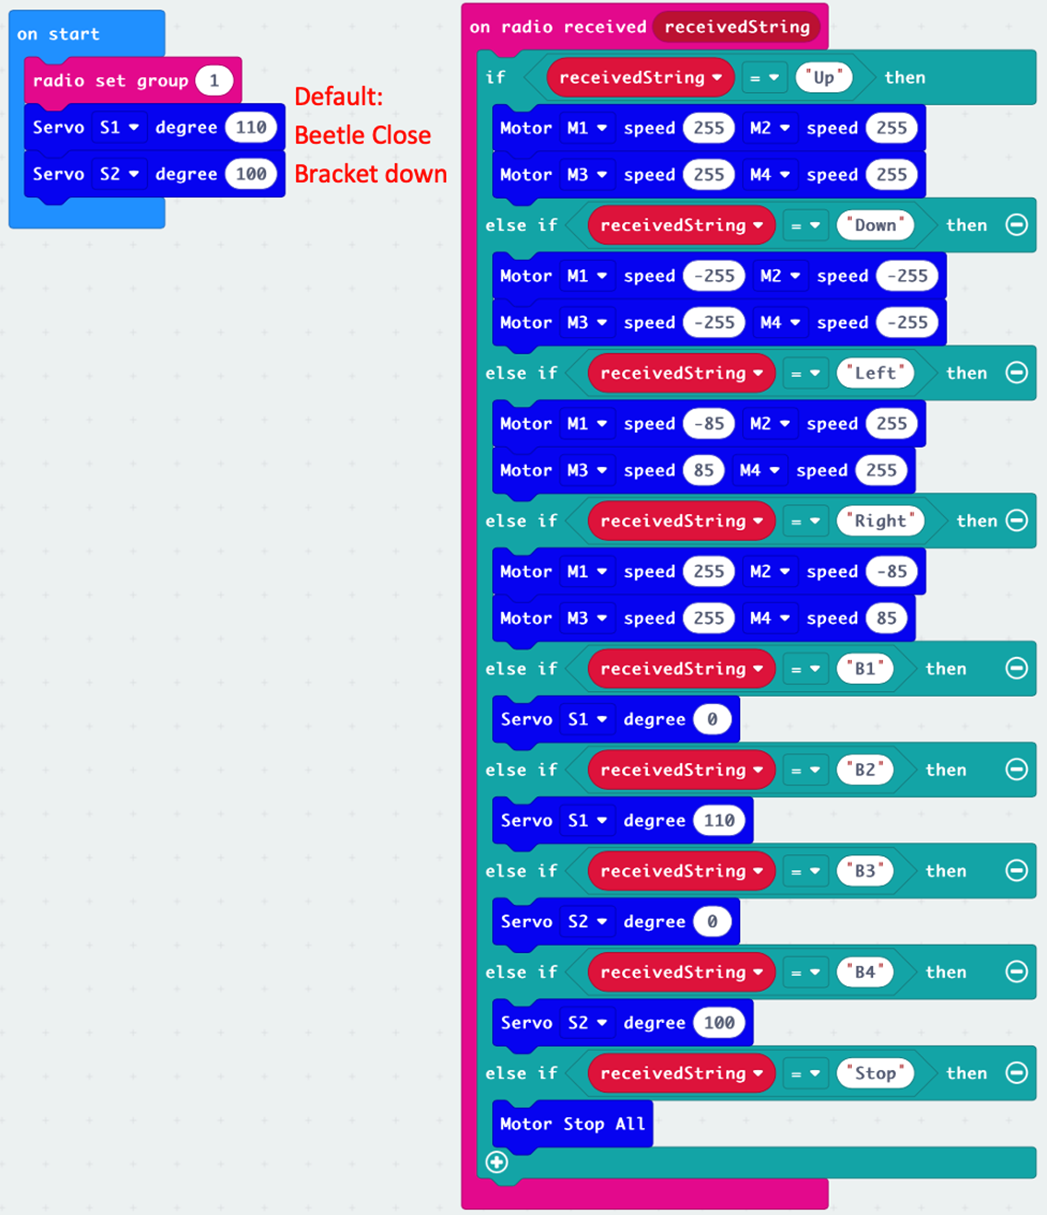
Design a program using the four buttons of the remote control to control the opening and closing of the clip and the lifting of the bracket respectively and control the car to clip the object from a lower starting point to a higher ending point.
9.5. Exercise 2
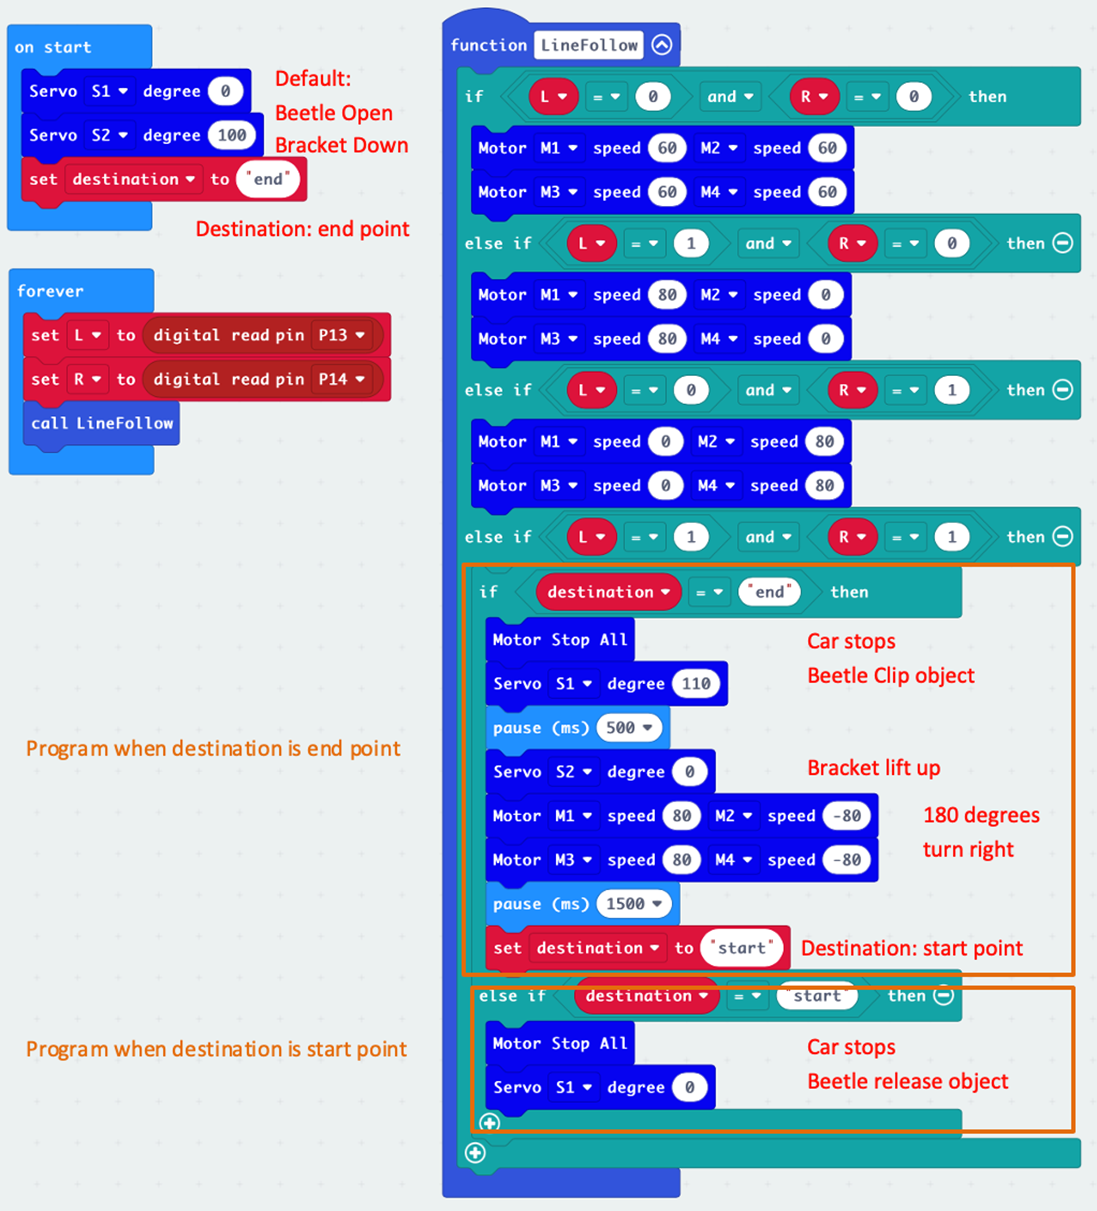
Design a program makes the car follow the black line to the end point, clip the object and turn 180 degrees back to the starting point by following the line, and place the object on a higher platform.
Hint:
The length of the clip will increase after adding the bracket, sufficient distance is needed when arranging the site.
Pay attention to whether it is necessary to pause when operating every tool.
Create a variable “destination” to record the destination, and use the destination to determine the action when the car goes out of bounds
9.6. Muti – function engineering car (Clips and Forks)
Although the micro:bit trolley has a variety of expansion tools, their purposes and premise are different, so, we were able to put both tools on the car at the same time and do multitasking.
9.7. Exercise 3
We now assemble the clip and fork in the same car, and then use the four buttons of the remote control to control the tool to open and close, lift, and rotate left and right in place.
(The installation of two tools will increases the size of the car, in place rotation can makes it easier to move when the car in narrow places)
Task: First clip the goods on the shelf, and then use the forklift to deliver the goods to the destination.
Hint:
The forklift is in front of the car and the clip is behind the car
Directly adjust the program in exercise 1
Create variables to record the usage status of the two tools, and use this status to determine the next action of the tool
9.8. Answer
9.8.2. Exercise 2
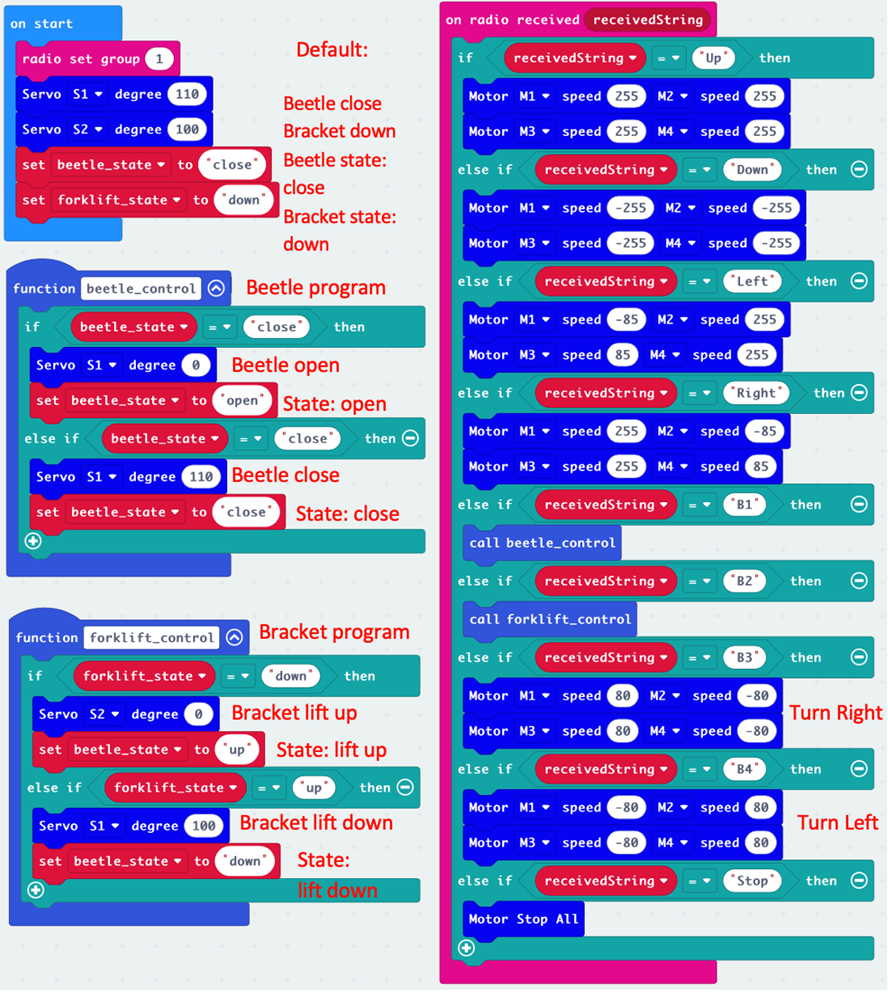
9.8.3. Exercise 3
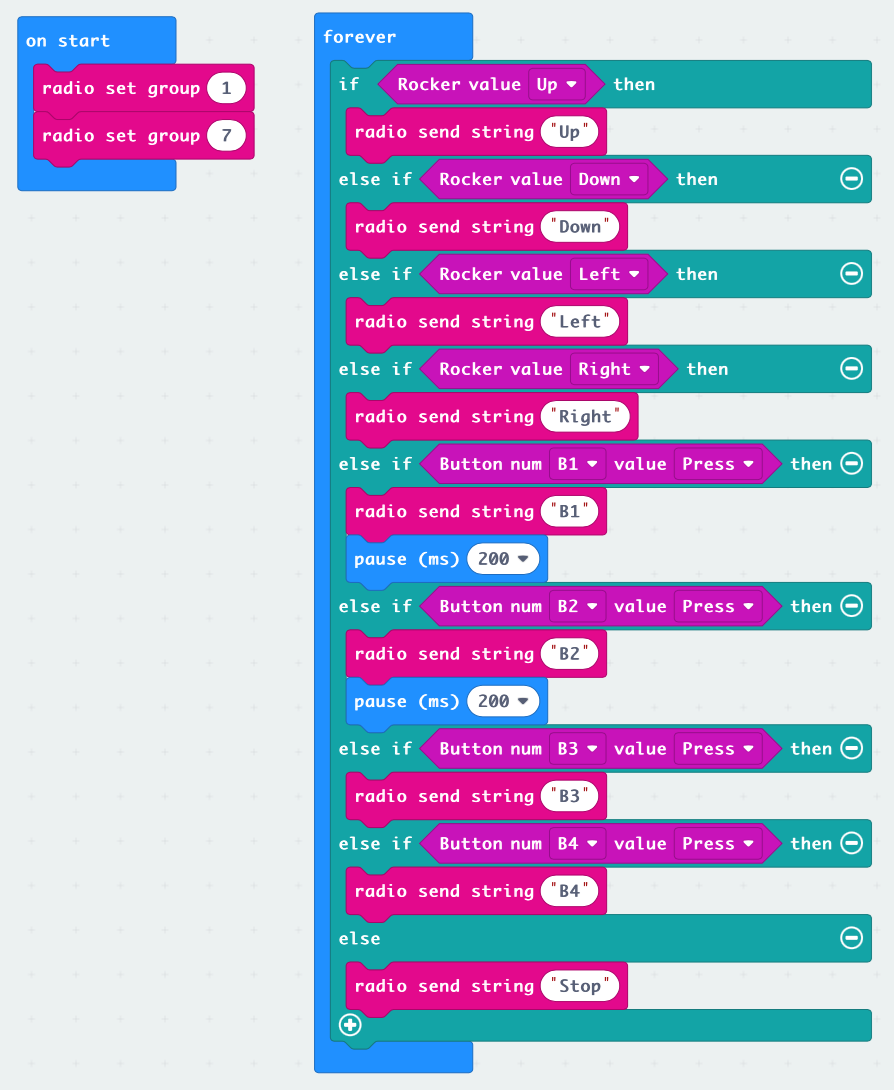
The procedure for the remote control is basically the same as in Exercise 1, except that it needs to pause after sending the B1 and B2 text to avoid sending too many signals.
9.8.3.1. Remote Program
9.8.3.2. Car program
B1 button: If the beetle_state (clip state) is close, the beetle is open and the beetle_state is set to close. If beetle_state is open at the time, the clip is closed and beetle_state is set to (close).
B2 button: If forklift_state (forklift state) is down, the bracket is raised and forklift_state is set to up. If the forklift_state was up at the time, the bracket is lowered and the forklift_state is set to down.