3. Lesson 3

3.1. Introduction
Welcome to Micro:bit Smart Car tutorial! In this course, we will explore Micro:bit and learn how to develop Micro:bit Smart Car by programming.
3.2. Learning Target
Let students clearly understand Micro:bit Smart Car’s extension tools and its functions, moreover, understanding its install and block coding method.
3.3. Understand Micro:bit expansion tool – Loader
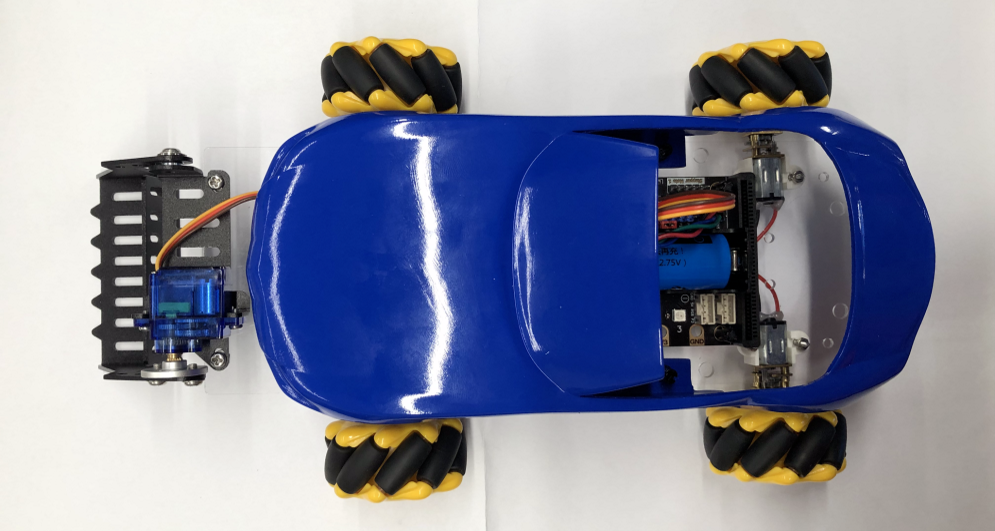
Micro:bit Loader mainly form by loader and servo motor, usually install in front of the car
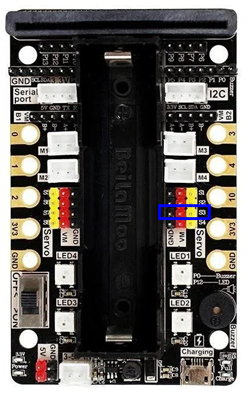
This time we will connect pin of servo to port S3 (pin in blue box), usually, dark wire (black or brown) will be connected to GND port (Black)
3.3.1. Principle and function of loader
In daily life, loader use to shovel, load, unload, transport of sand and rock, it can also handle work with rock, hard soil.

Limited by the angle, Micro:bit loader can’t dig downward, if needed to load huge object, we must provide enough space under the object to let the loader place in or need to push the bottom of the object and let it land on loader direction, then can load successfully.
3.3.2. Install of Loader
Components:
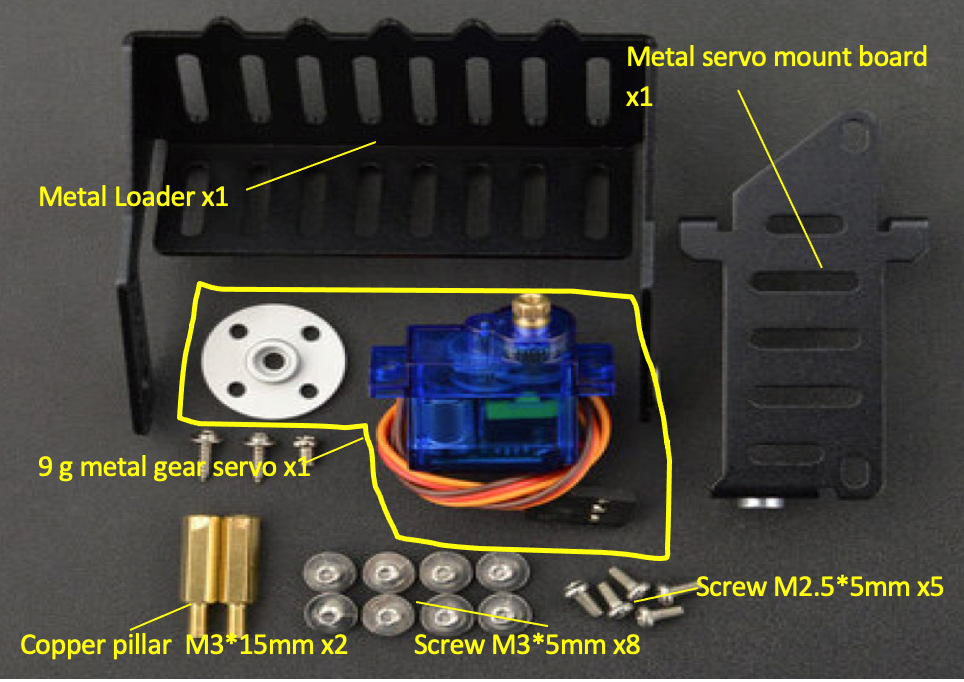
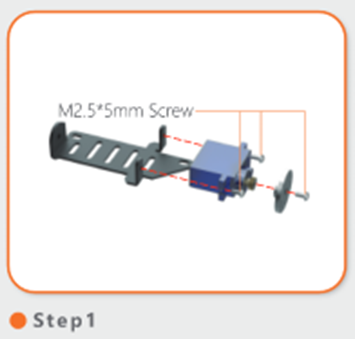
1)Use three M2.5*5mm screw, combine servo, servo conection board and servo installation board together.。
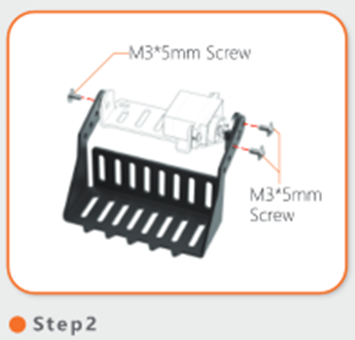
2)Use three M3.5*5mm screw, install loader on completed servo installation board.
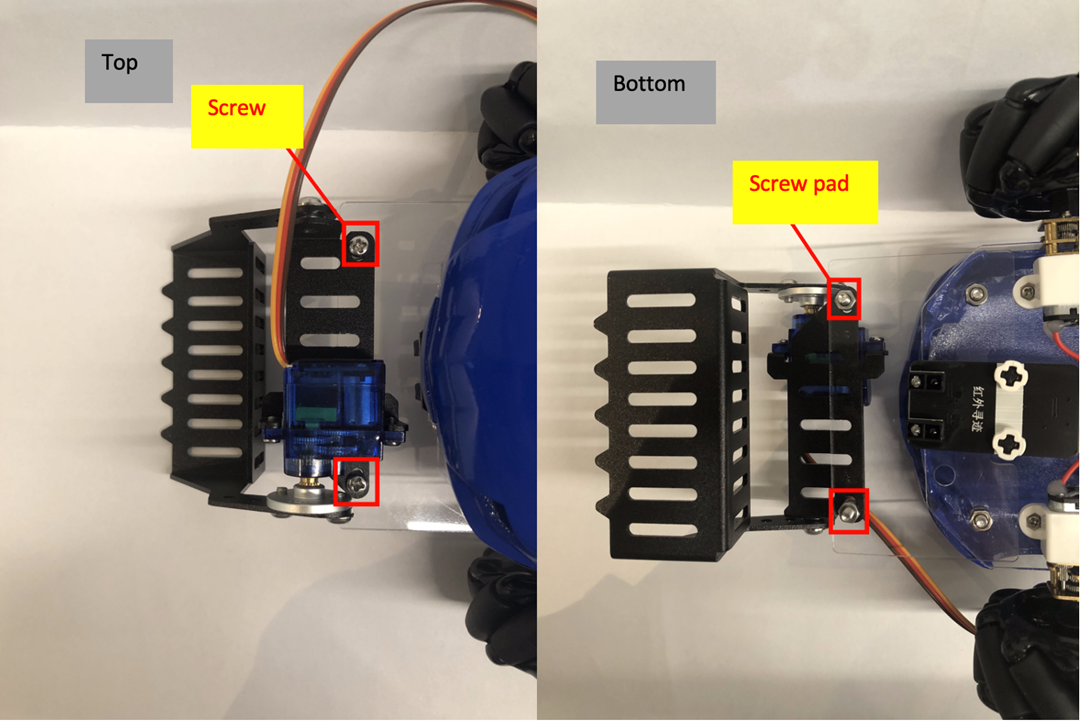
3)Use two screw, two screw pad, install loader to car/expansion board, as shown below.
3.4. Exercise 1
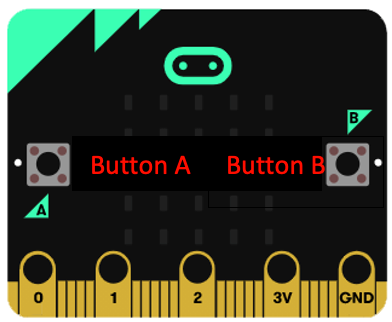
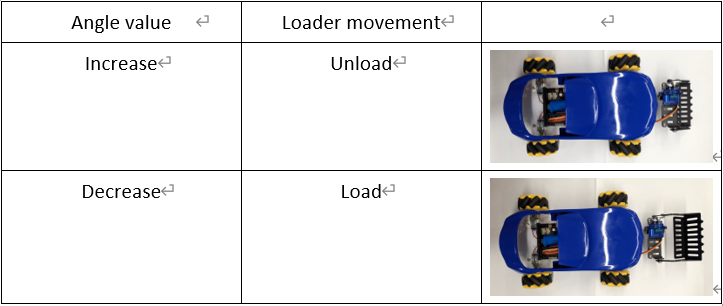
Design program to move loader upward or downward use bottom A and B on Micro:bit board
Hint : Try servo with different value and observe its movement.
(Recommend angle value is 80 - 150)
| Angle value | Loader movement |
|---|---|
| Increase | |
| Decrease |
3.5. Exercise 2
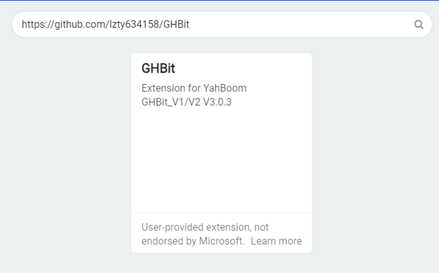
Installation of remote expansion package:
Enter link in yellow box: https://github.com/lzty634158/GHBit ,Add GHBit in makecode
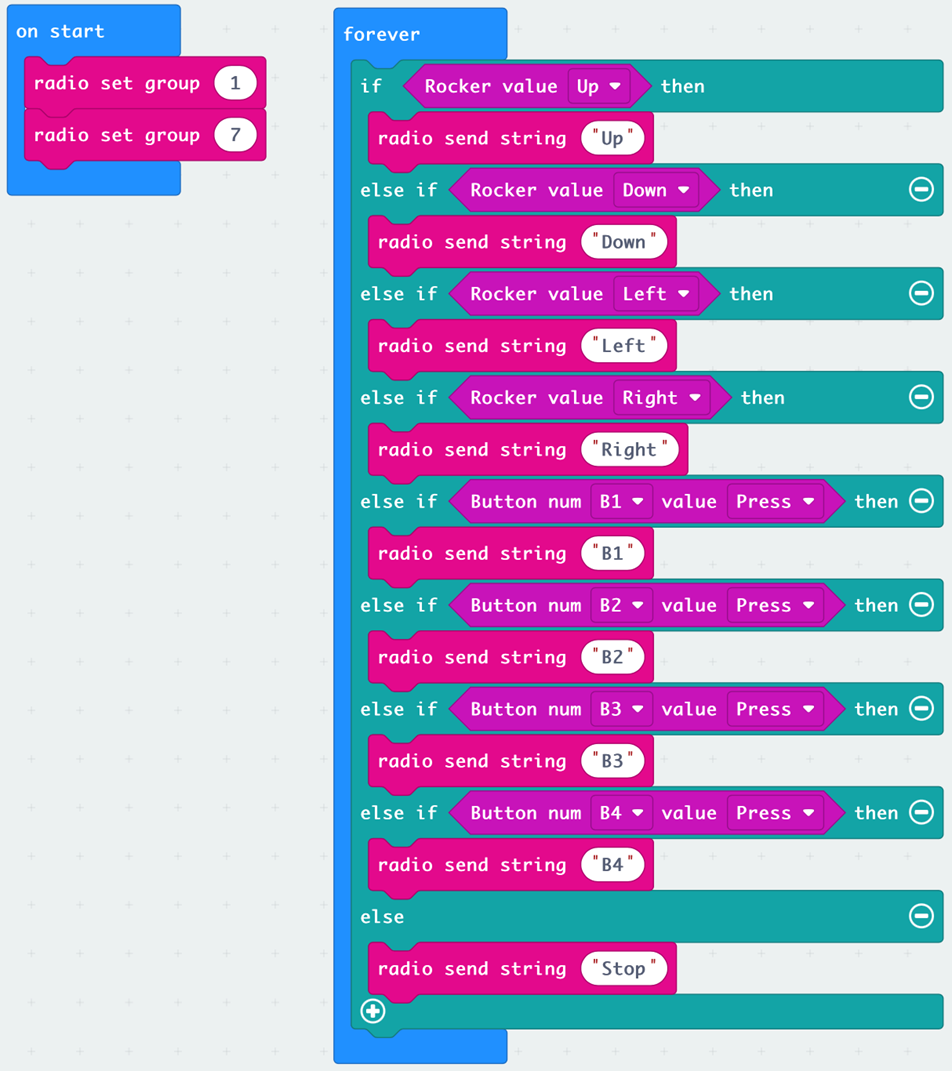
Design program of car and remote:
B1 and B4 bottom control the horizontal movement of left and right
B2 and B3 bottom control the load or unload of loader
Control rods control the back and forward and turning left or right
Car stops when pending of remote
When load or unload, DoReMi and SoFaMi will play respectively ( or any other melody)

Hint :
Refer to Beginner, Lesson 10, Receive text as operation condition
Use of sound effect >> perform melody speed (bpm) in block module
After completed exercise 2, you can play freely with the loader
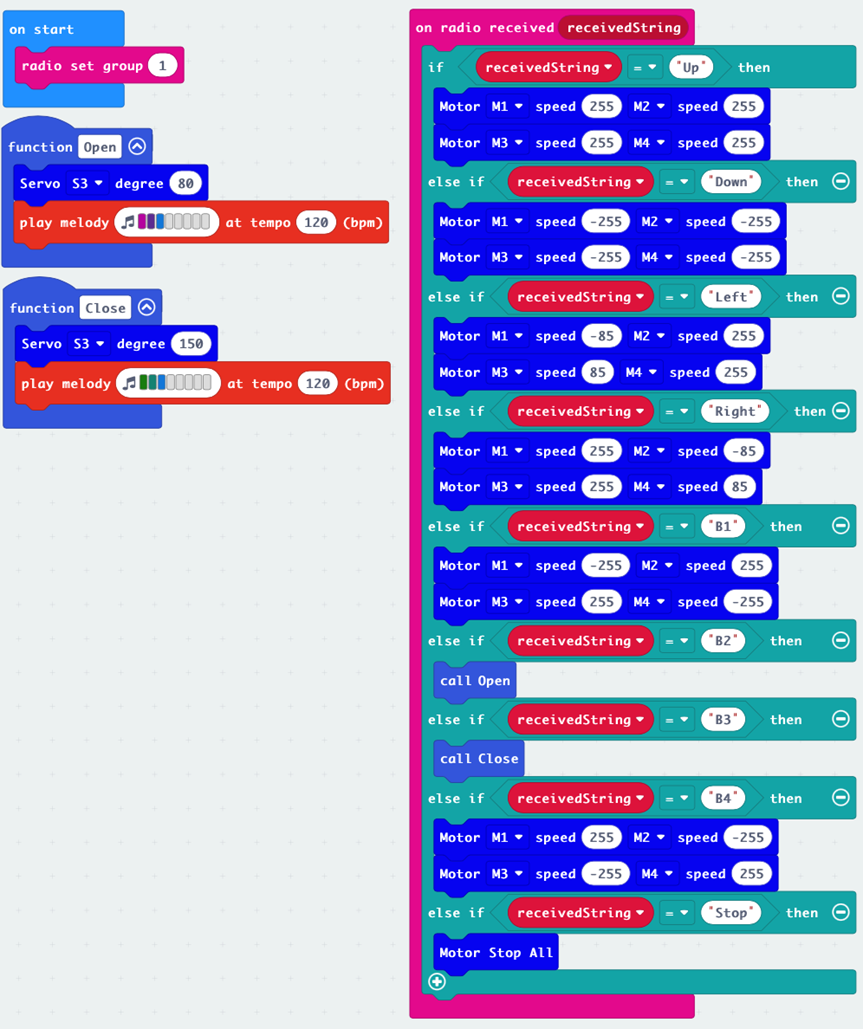
3.6. Answer
3.6.1. Exercise 1

3.6.2. Exercise 2
3.6.2.1. Program of remote
Remote control of the back and forward, left and right and horizontal movement, refer to beginner, Lesson 10, Exercise 2.
3.6.2.2. Program of Car
Remote control of the back and forward, left and right and horizontal movement, refer to beginner, Lesson 10, Exercise 2.
When receive “B2”,load up and play DoReMi.
When receive “B3”,unload and play SoFaMi.