6. Lesson 6
6.1. Introduction
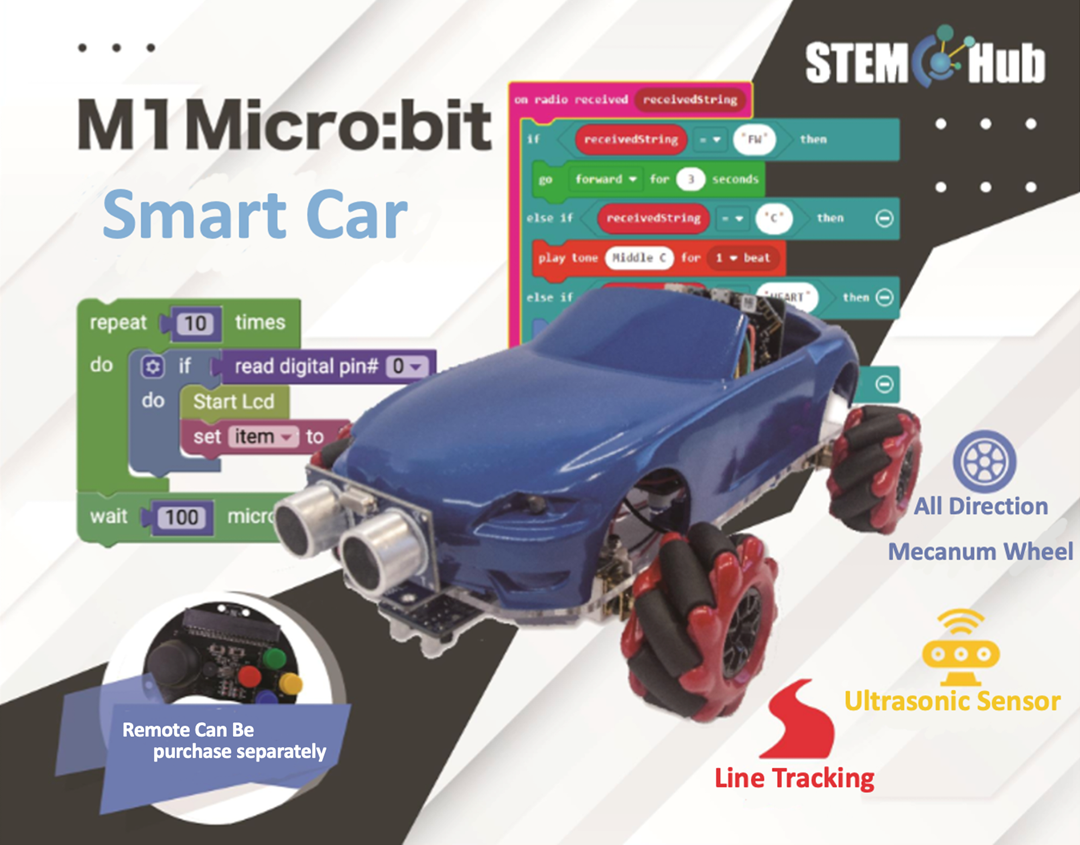
Welcome to Micro:bit Smart Car tutorial! In this course, we will explore Micro:bit and learn how to develop Micro:bit Smart Car by programming
6.2. Learning Target
Let students clearly understand Micro:bit Smart Car’s extension tools and its functions, moreover, understanding its install and block coding method
6.3. Use of forklift tools
After learning about the assembly and principles of forklifts in the previous lesson, we are now applying them to various exercises.
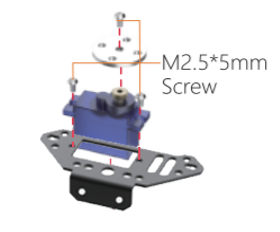
6.3.1. To install the ultrasonic sensor

1)Assemble the other servo with three M2.5*5mm screws, and install the pan-tilt-zoom mount plate.
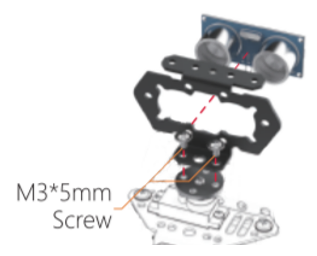
2)Put the ultrasonic sensor into the universal expansion mounting plate, and use two M3*5mm screws to attach the universal expansion mounting plate to the pan-tilt-zoom mounting plate.
3)Use two screws, two screw pads, and two copper pillar to mount the fork with the ultrasonic sensor to the car
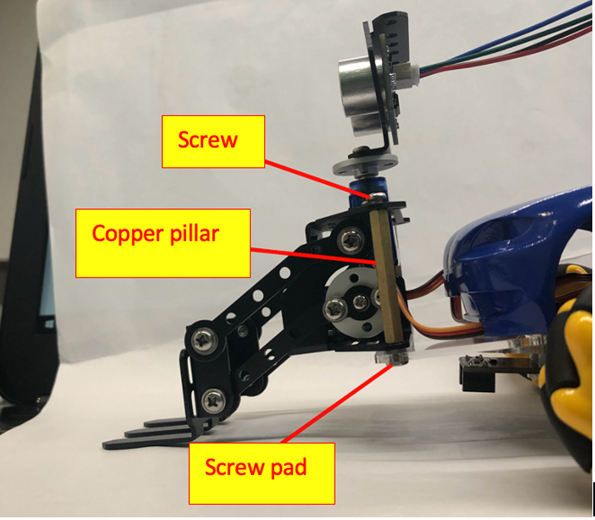
Finished diagram:

6.4. Exercise 1
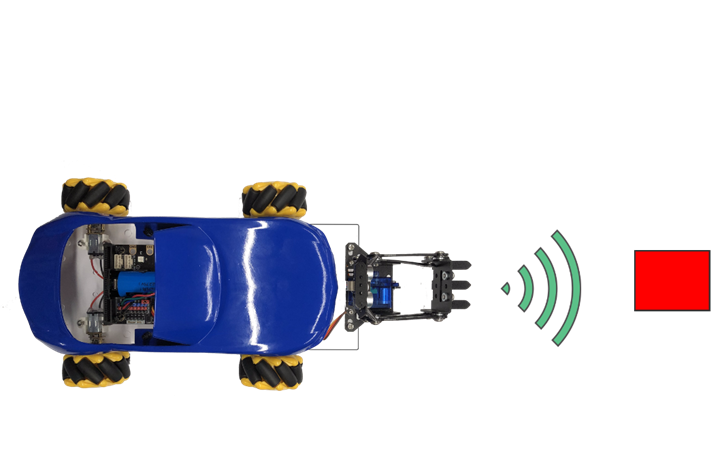
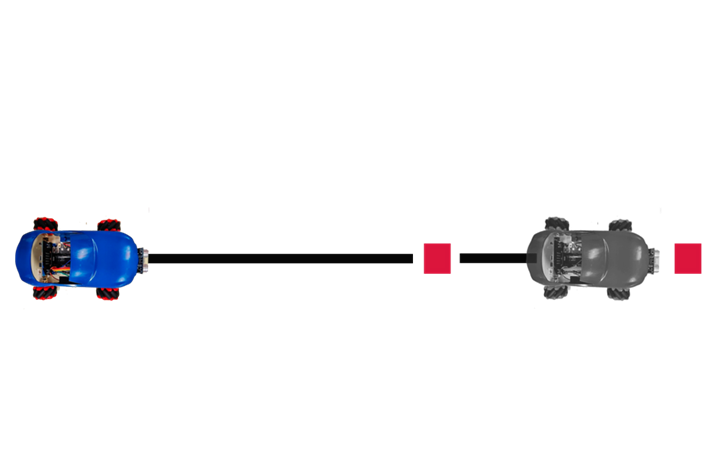
Automatic Sensor (Ultrasonic)
Use ultrasound to detect whether there is something that can be carried in front of the car, and then lift the object with a forklift. (If it is not detected, the car will continue to move forward until it encounters an obstacle).
6.5. Exercise 2
Automatic handling of goods (line tracking)
1. Follow the black line
2. Until the sensor detects white color, stop immediately
3. Lift the cargo
4. Continue to follow the black line
5. Until the sensor senses white color again, put down the goods
6.6. Exercise 3
Combining exercises 1 and 2, write a program so that the car can automatically sense the approximate position of the goods, lift up and follow the black line until it reaches the end (go straight until it senses white).
Tip: It is recommended to use functions, one for ultrasonic and one for line tracking sensor

6.7. Answer
6.7.1. Exercise 1
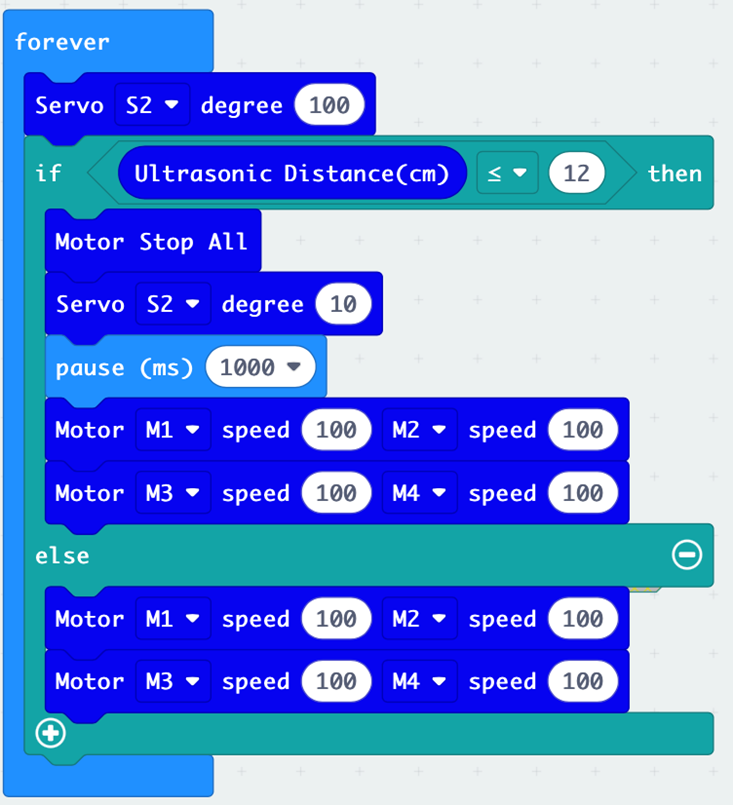
First, adjust the angle of the forklift
The first red box is when the distance read by the ultrasonic is less than or equal to 12, the car will stop and then the servo will be raised
The second red frame is when the ultrasonic wave does not detect obstacles, the angle of the servo is still 0, and then the car will continue to move forward
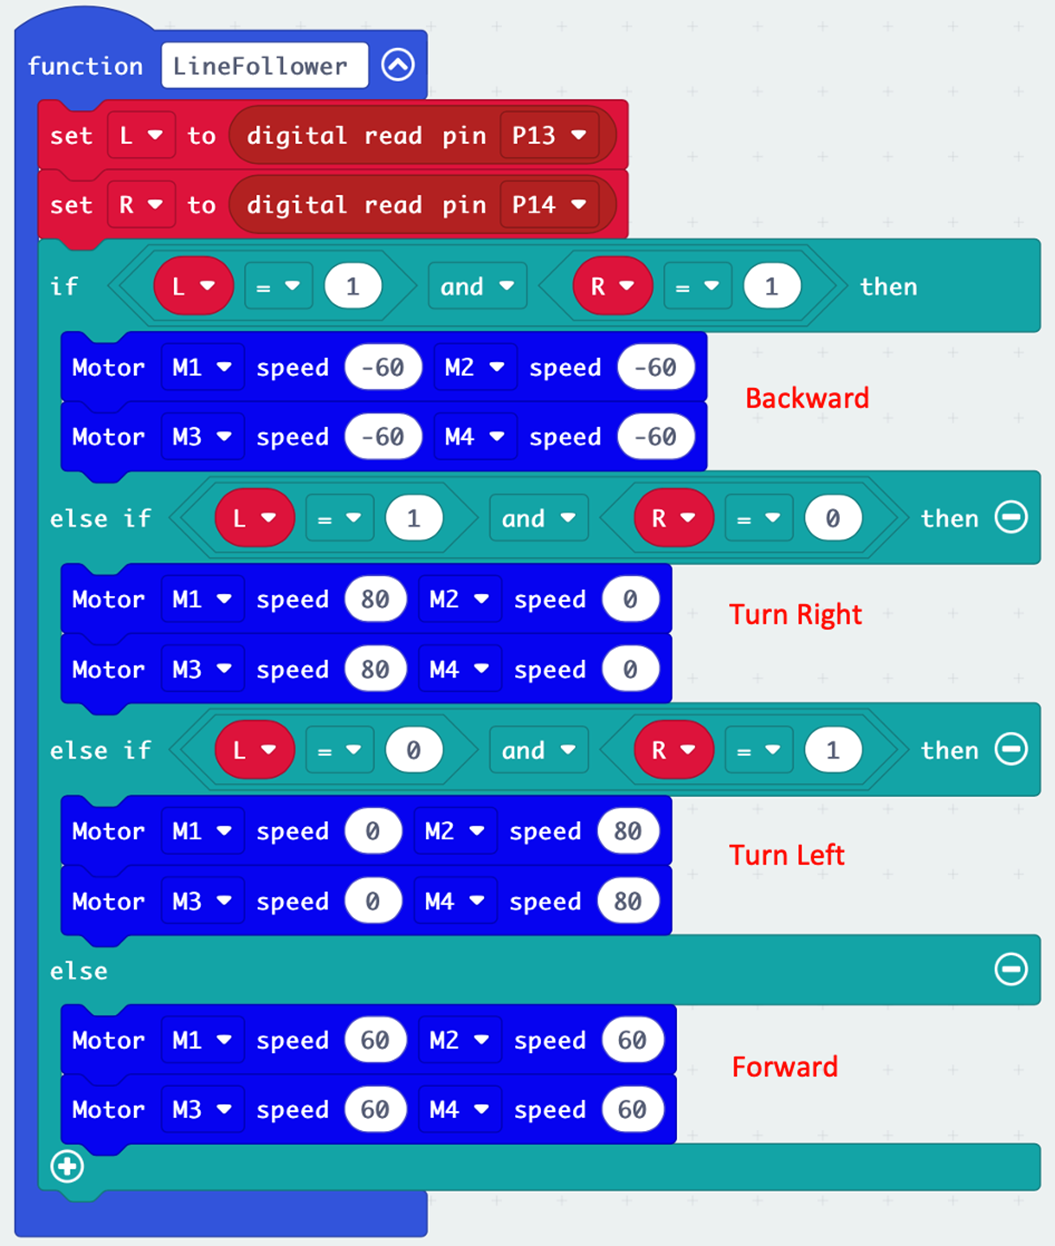
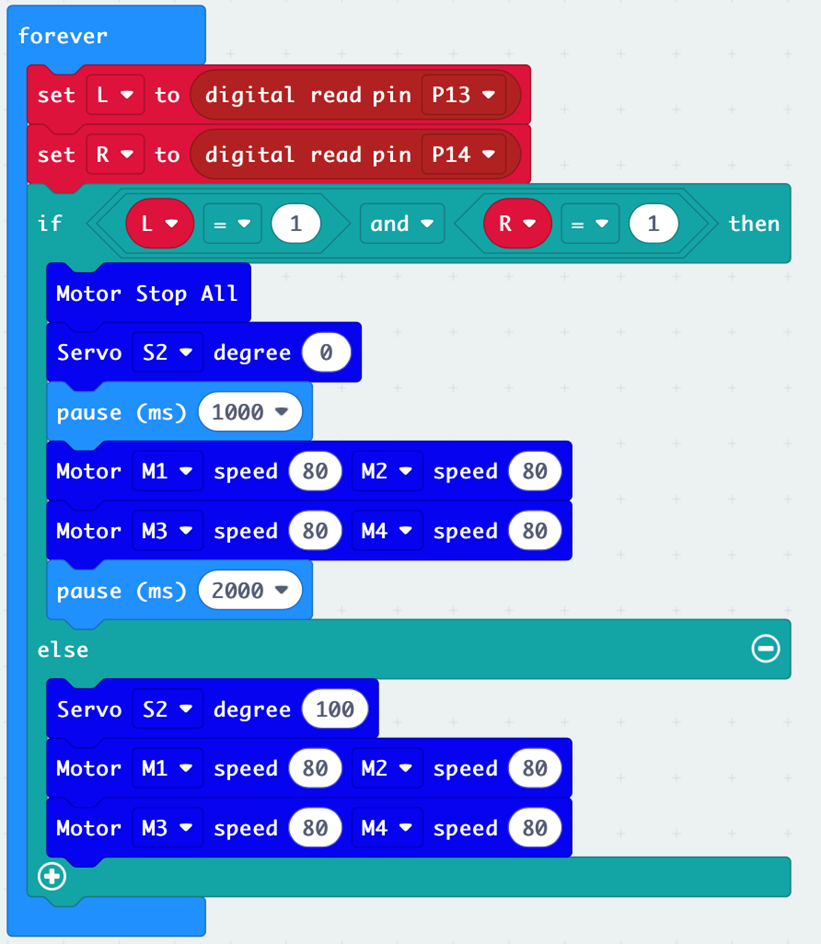
6.7.2. Exercise 2
Remember what the value of the line tracking sensor means?
(1 is white, 0 is black)
So, the first red box means that when it encounters white, the car will stop moving, then lift the forklift and continue to move forward
The second red frame means that when it encounters black, the fork will be put down and the car will continue to move forward
(We generalize (0,1), (1,0) as encounter black)
6.7.3. Exercise 3
First, define two functions, one is ultrasonic, which is used to sense the position of the goods, and the other is line tracking, which is used for following the black line.
We must first distinguish whether the ultrasonic or the line tracking function has priority. Since we have to sense whether the goods are in front of the car, and then walk along the black line, so, the ultrasonic function has priority and will be called repeatedly.
In the ultrasonic function, when the ultrasonic reading distance is less than 5, the car will stop moving, and then raise the fork tool.
If the ultrasonic wave does not sense the goods, the line tracking function will be called.
Initialization: The angle of the fork is 80 at the beginning.

6.7.3.1. Line tracking module