5. Lesson 5 and Lesson 6
5.1. Introduction
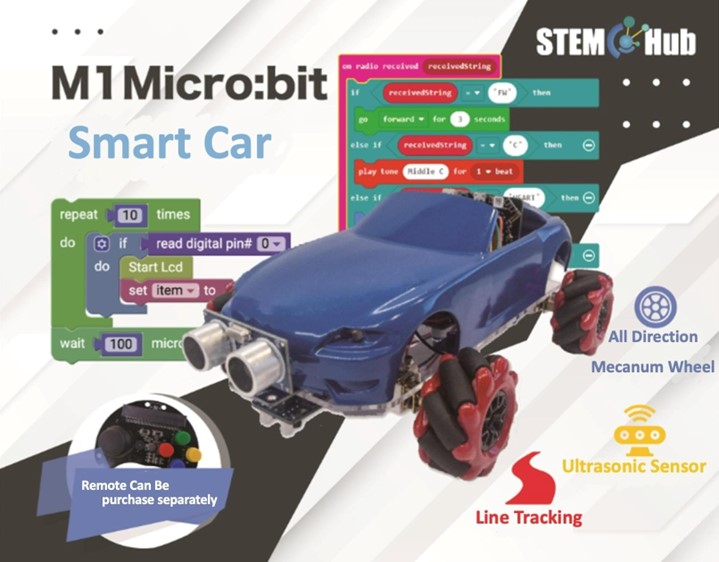
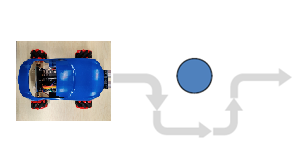
Welcome to the Micro: bit Smart Car Tutorial!In this course, we will explore the Micro: bit and learn how to control the Micro: bit car in programming.
5.2. Teaching Objectives
Let student master the principal and function of ultrasonic sensor on Micro: bit SMART CAR and understand the ranging/ obstacle avoidance.
5.3. Ultrasonic Obstacle Avoidance
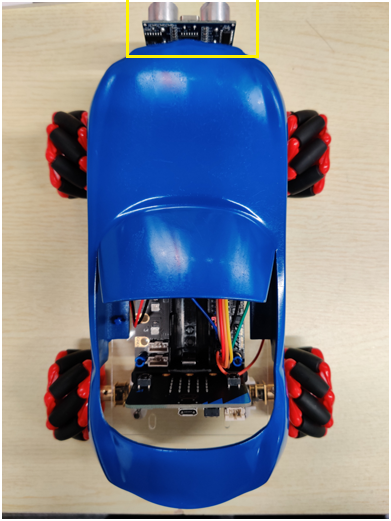
The ultrasonic sensor is set in front of the car, and the ultrasonic sensor can only detect obstacles directly in front.
5.4. Principal of ultrasonic module
Ultrasonic modules are not affected by light, just like bats, they are almost blind, but they can still dodge obstacles in the dark.
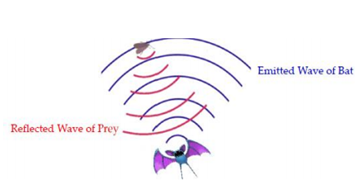
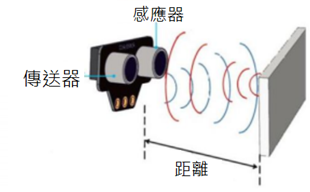
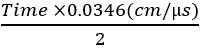
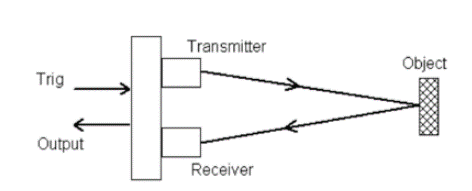
The ultrasonic module transmits an ultrasonic wave to the front. When the ultrasonic wave touches the object, it will bounce back, and then the sensor will receive the ultrasonic wave. The time between transmission and reception of the signal is used to calculate the distance.
Calculation formula are as follow:
Distance (cm) =
The color of RGB light on the car can be controlled by programming, but every color needs to well defined in programming. Undefined colors cannot be displayed in RGB lights.
This module can only detect object distanced 2~400cm.
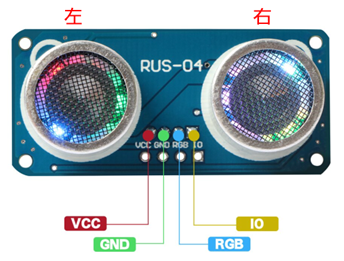
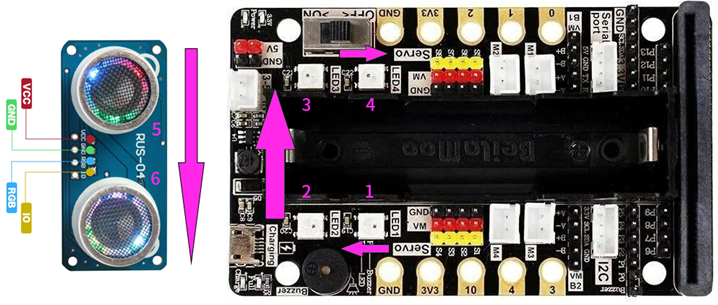
5.5. Stemhub: bit Ultrasonic
In Stemhub: bit > “Ultrasonic”, there will have 3 major modules:
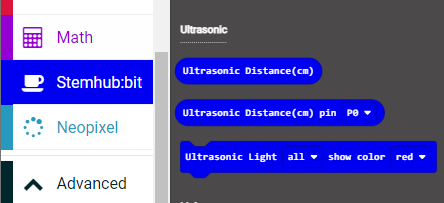

The output will be the distance measured using the ultrasonic(Default pin: P2) (Output:Number)

The function is the same as above, but the pin can be set by yourself

Set Ultrasonic light(left or right) and color (Red, orange, yellow, green, blue…)
5.6. Exercise 1
Design a program to turn on the light on expansion board and ultrasonic module in order.
Hint:Do you remember how to control the on/off and brightness of light on expansion board?

5.7. Exercise 2
Design a program to display the distance measured by the ultrasonic module on Micro: bit board
Hint:

5.8. Exercise 3
Design a program to convert the measured distance to song and display different color on LED light.
Hint 1:Define different color and sound effect to represent different distance
Hint 2:Every time after the sound effect played, ‘stop’ is needed to prevent Micro: bit board crash)
(Try to use simple melody middle CDEFG and red, orange, yellow, green, blue for testing)
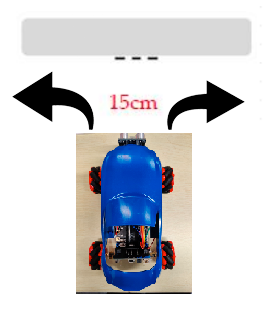
5.9. Exercise 4
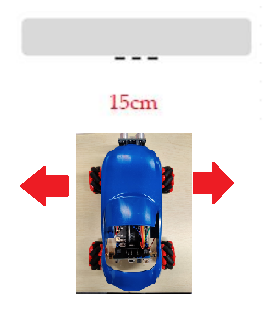
Design a program allows the car to turn left/right when there are obstacles in front of it. (Example: <15cm).
5.10. Exercise 5

Design a program allow the car to follow your hand and keep the distance in 10 cm.
Hint:Separate the program into three parts
5.11. Exercise 6

Design a program to control the car. It will turn 180 degrees when it faces obstacle.
5.12. Exercise 7
Design a program to control the car, whenever the car faces an obstacle, it will turn right to dodge the obstacle and then move forward.
Hint:How many times will the car turns and go straight?
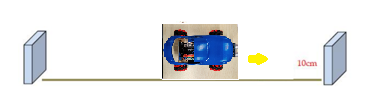
5.13. Exercise 8
The car can be able to move from starting point to the destination without hitting any obstacles.
Hint: The program will separate to 3 major parts (turn to left when facing obstacles, turn to right when facing obstacles, continuously moving forward)
5.14. Think about it
Ultrasonic sensor can be used to measure the height of a person, do you agree?
If yes, where should we place the ultrasonic sensor?
5.15. Answer
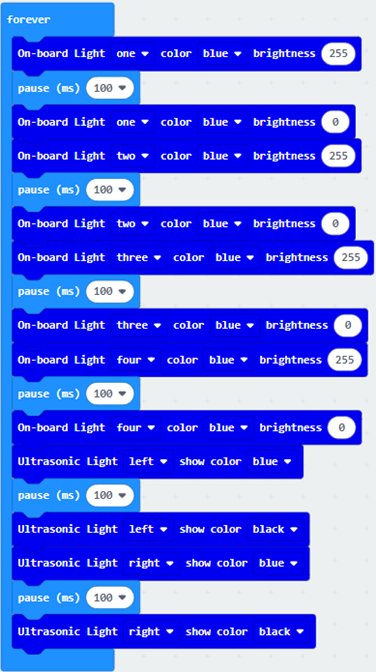
5.15.1. Exercise 1
Most of the part in the upper side (Red box) Refer to Ch.2 Exercise 1
Setting the color of light on ultrasonic module into blue by the lower part.
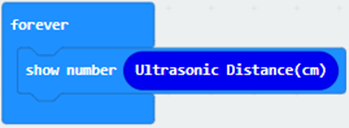
5.15.2. Exercise 2
Since the distance measured is a numerical value, the digital display module will be used
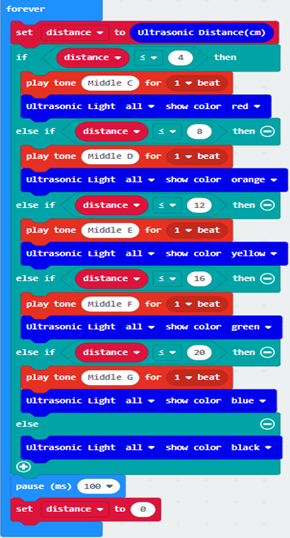
5.15.3. Exercise 3
| obstacle distance | musical scale | Color of light on ultrasonic module |
|---|---|---|
| 1-4 | Middle C | Red |
| 5-8 | Middle D | Orange |
| 9-12 | Middle E | Yellow |
| 13-16 | Middle F | Green |
| 17-20 | Middle G | Blue |
| - | Black(none) |
5.15.4. Exercise 4
Design a program to control the car, whenever the car faces an obstacle (For example:<15cm), the car will turn left/right.
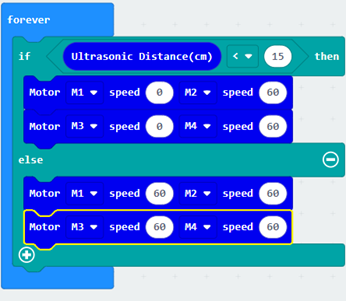
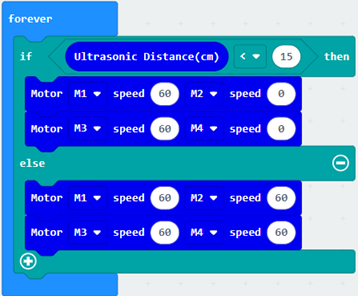
Setting the condition: The car will turn left or right when obstacle distance is less than 15cm, move forward otherwise.
5.15.5. Exercise 5
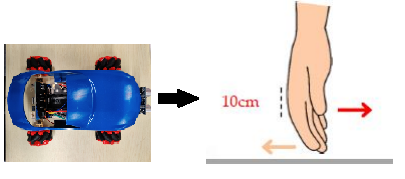
Design a program allow the car to follow your hand and keep the distance in 10 cm.
The program will separate to three parts:
When obstacle(hand)and the car distanced 10cm above, the car will move forward
When obstacle(hand)and the car distanced 10cm less, the car will move backward
When obstacle(hand)and the car distanced 10cm,the car will stop there to avoid distancing furthermore.

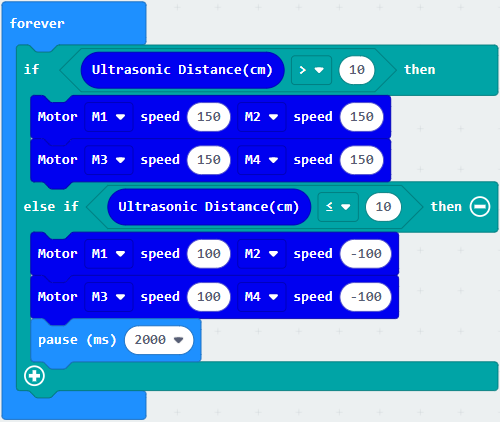
5.15.6. Exercise 6
Design a program to control the car. It will turn 180 degrees when it faces obstacle.
If there is no obstacle (we assume there is no obstacle in the front when obstacle is farer than 10cm), the car will move straight forward continuously.
If the car faces an obstacle (10cm or 10cm less), stop the movement first, and rotate to right by 180 degrees.
(**The rotating angle is related to the rotating time **)
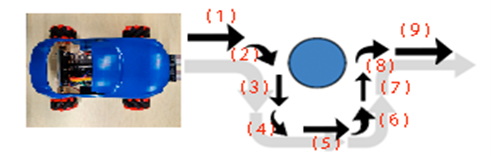
5.15.7. Exercise 7
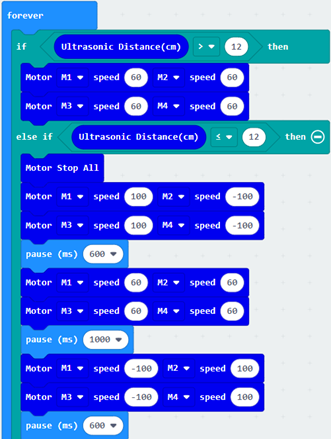
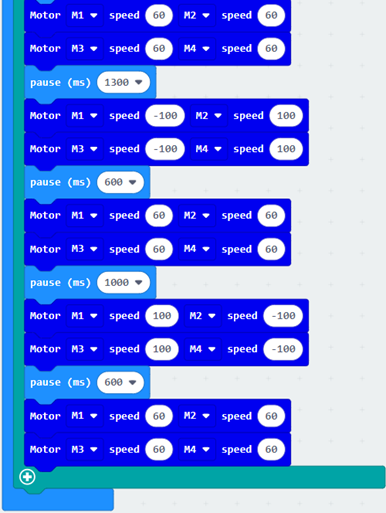
**The car will move straight forward for 5 times,turn right 2 times, and turn left 2 times**
Route of the car:forward, turn right, forward, turn left, forward, turn left, forward, turn right
**The seconds it takes will vary for different car**
5.15.8. Exercise 8
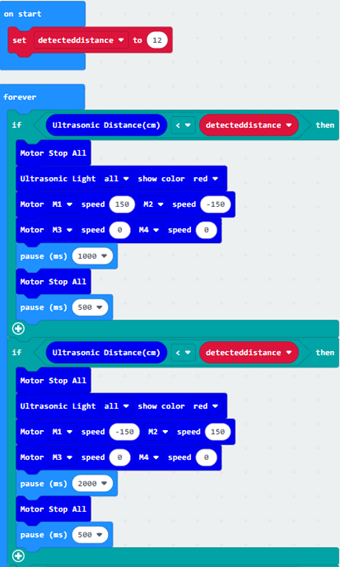
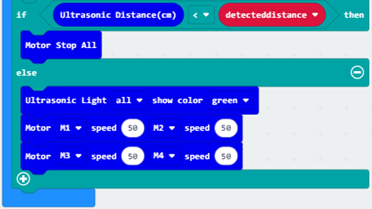
First, set the ‘detecteddistance’ be 12
The program will separate to 3 major parts (turn to left when facing obstacles, turn to right when facing obstacles, continuously moving forward)
**Pay attention to the usage of ‘if...else’, if the condition of ‘if’ is not fulfilled, the execution will skip the statement in ‘if’ and execute statement in ‘else’**
5.15.9. Appendix
Initially, Micro: bit do not include the ultrasonic block module in Stemhub: bit, operating with the ultrasonic sensor requires programming using pin block module.
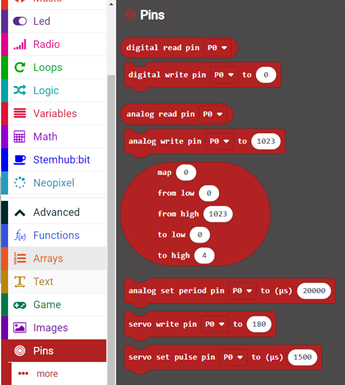

Input digital signal (0 or 1) to pin。
1 is to activate the pin, start transmitting signal.
0 is to switch off the pin ,stop transmitting signal.
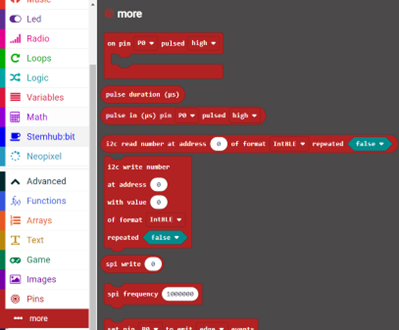

Calculate the time between transmitting signals and receiving signal.
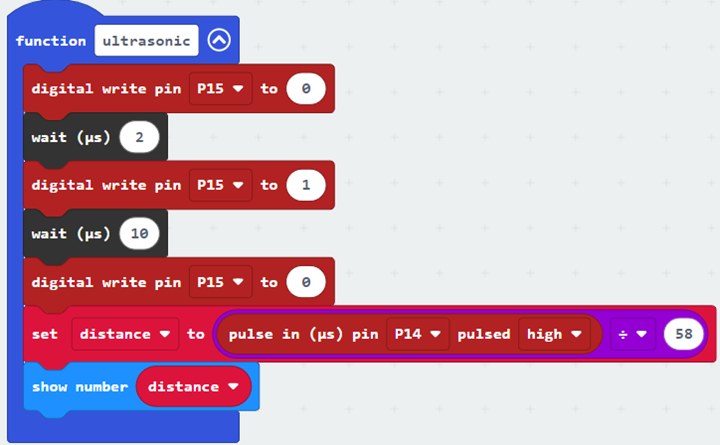
5.16. Programming for Ultrasonic Sensor
(1)Initialize the digit of pin to be 0, and wait for 2 microseconds.
(2)Write signal 1 to the pin,start transmitting ultrasound, wait for 10 microseconds。
(3)Write signal 0 to the pin,stop transmitting ultrasound。
(4)Set up a variable “distance”, set it as the time between transmitting signals and receiving signal at pin P14 and divided by 58 to measure the distance of the obstacle.
(5)Display the distance on the screen of Micro: bit.
(6)Finally set the program as a function.