10. Smart Traffic Lights
10.1. Goal
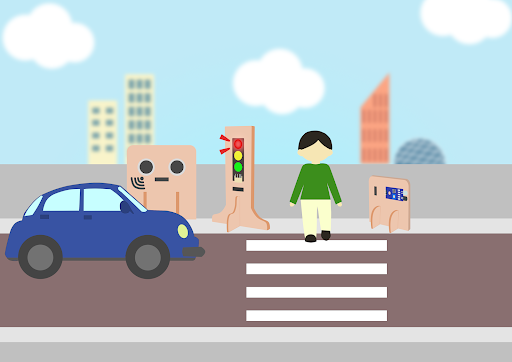
On the basis of the previous lesson, make a smart traffic light. It will control the light switch of the traffic lights before braking and before resuming normal driving, so that drivers can easily understand the status of the road.
10.2. Background
10.2.1. What is a smart traffic light?
A smart traffic light will automatically switch to red when it senses the approach of the human. After 5 seconds, switch back to the green light and let the car return to normal driving.
10.3. Part List
Microbit (1)
Expansion board (1)
Distance sensor(1)
Obstacle Infrared avoidance sensor (1)
Traffic light (1)
4-pin module wire (1)
Female To Female Dupont Cable Jumper Wire Dupont Line (7)
M3*8mm screw (1)
M2*8mm screw (4)
M3 nut (1)
M2 nut (4)
Screwdriver(1)
Module B (1)
Module E (1)
Module I(1)
10.4. Assembly step
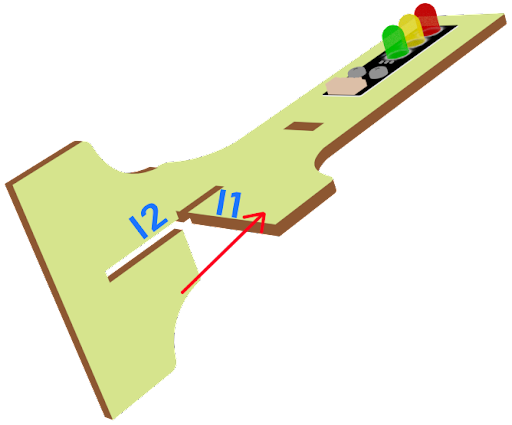
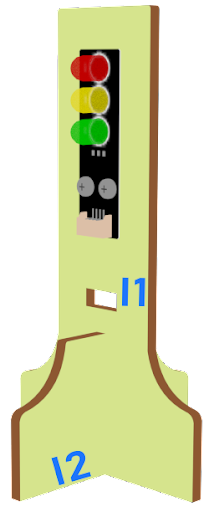
10.4.1. Step 1
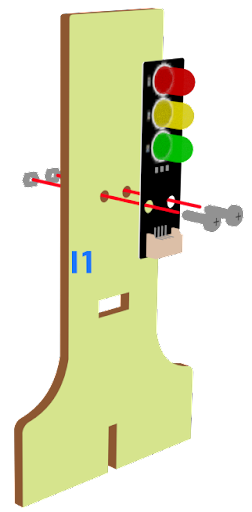
On the basis of lesson7, attach the Traffic light Module to I1 model using M3*8 screw and nut.
10.5. Hardware connect
Microbit 1:
Connect the Traffic light LED Module to P1 P2 P3 port
Connect obstacle Infrared avoidance sensor to P4 port
Connect the Distance Sensor to P15 (trig)/ P16 (echo) port
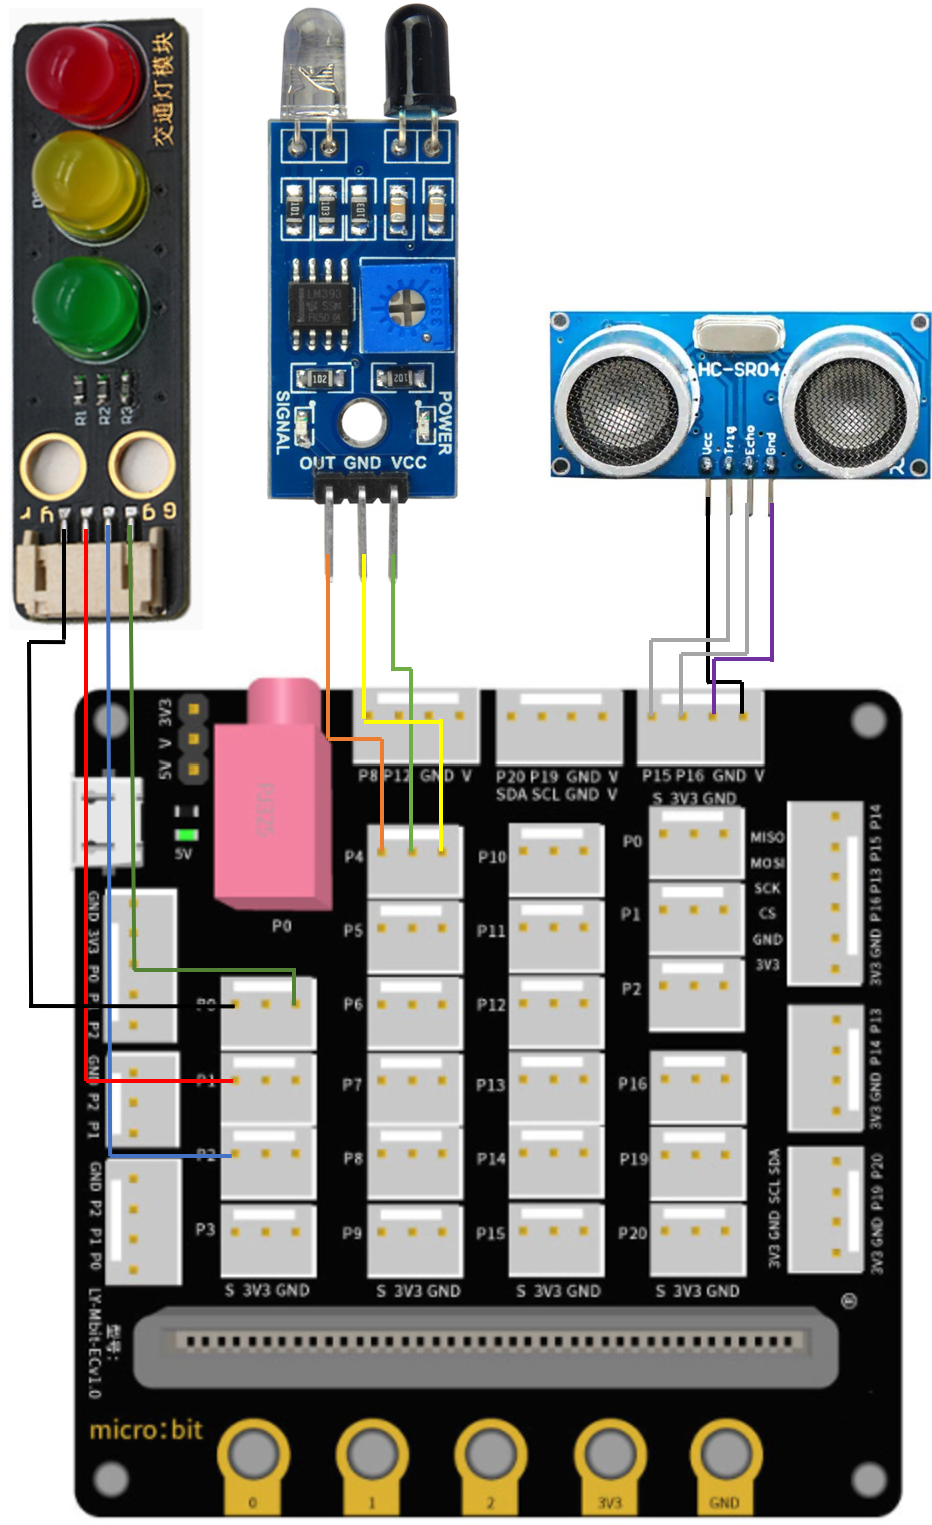
Microbit2:
Car
10.6. Programming (MakeCode)
10.6.1. Sender:
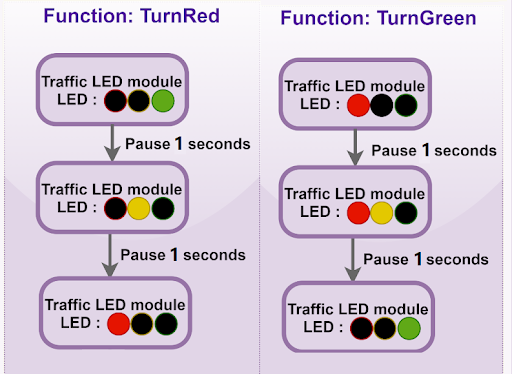
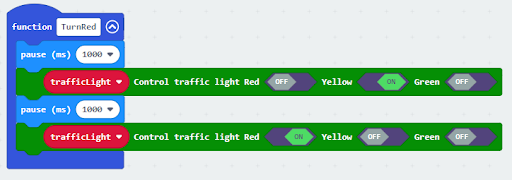
10.6.2. Step 1. Set up a new function (TurnRed)
Snap pause to wait 1 second
Control traffic light yellow on
Snap pause to wait 1 second
Control traffic light red on
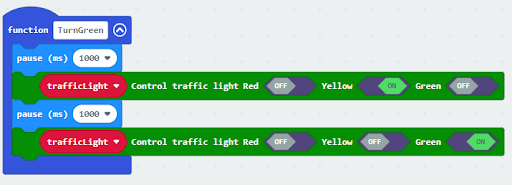
10.6.3. Step 2. Set up a new function (TurnGreen)
Snap pause to wait 1 second
Control traffic light yellow on
Snap pause to wait 1 second
Control traffic light green on
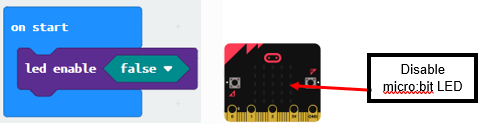
10.6.4. Step 3. Disable micro:bit LED.
Snap led enable false to on start
Note that P3 is used as LED in default setting, LED need to be disable
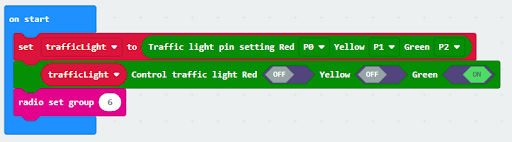
10.6.5. Step 4. Initialize the program similar as last lesson
Drag set variable trafficLight to Traffic light pin setting Red P0 Yellow P1 Green P2 to on start
Control traffic light green on
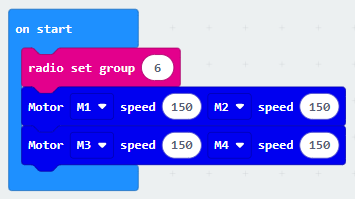
Drag radio set group 6 to on start
10.6.6. Step 5. Call function
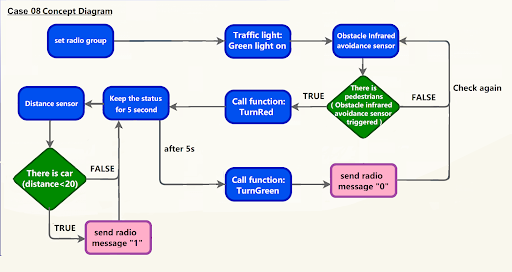
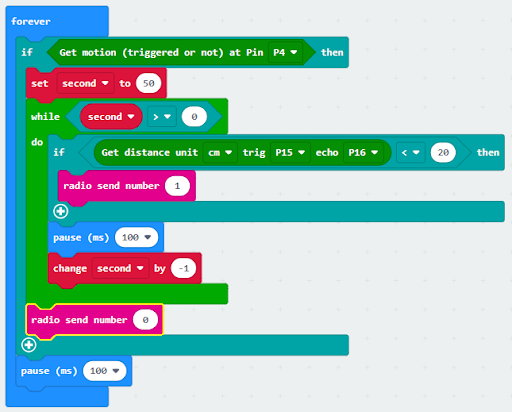
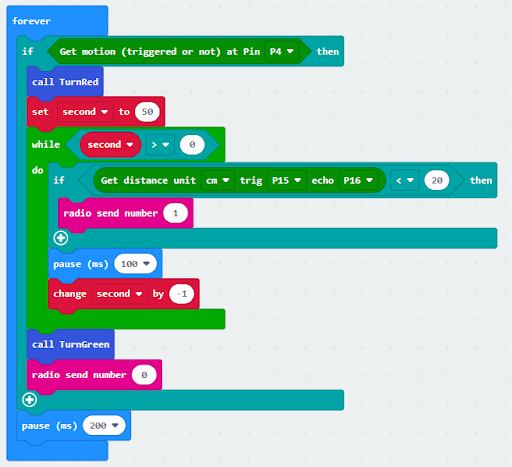
Snap function TurnRed into if get motion (triggered or not) at pin P4 case
Drag function TurnGreen after the while loop
Full solution
https://makecode.microbit.org/_XEKU87ijgFY2
10.6.7. Receiver:
10.6.8. Step 1. Set radio set group at start position
Drag radio set group 6 to on start
Initially, the car moves forward by default
10.6.9. Step 2. Control car by receiving different number
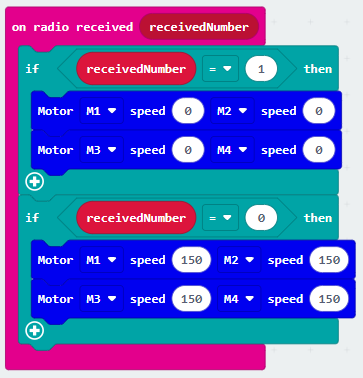
Snap if statement into on radio received receivedNumber
Set receivedNumber =1 and make the car stop
Set receivedNumber=0 and make the car move forward
Full solution:
https://makecode.microbit.org/_4hW5yAXg8f5T
https://makecode.microbit.org/_1o1iRhg3qfRF
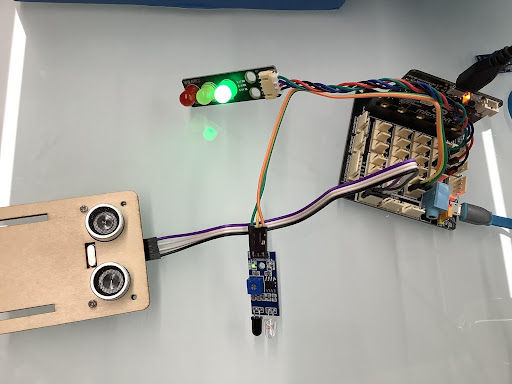
10.7. Result 總結
On the basis of the last lesson, a traffic light module is added in this lesson.
10.8. Think
Q1. How can we add sound effects to the traffic LED Module according to the corresponding color?