Lesson 08: Smart Traffic Lights 智能交通燈
8.1 Goal 目標
On the basis of the previous lesson, make a smart traffic light. It will control the light switch of the traffic lights before braking and before resuming normal driving, so that drivers can easily understand the status of the road.
在上一課的基礎下,製作智能交通燈。會在刹車前及恢復正常行駛前,控制交通燈的燈光轉換,讓方便司機了解道路狀態。
## 8.2 Background 背景 ### What is a smart traffic light? 什麽是智能交通燈?
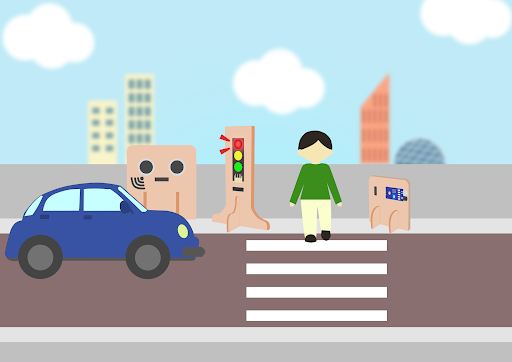
A smart traffic light will automatically switch to red when it senses the approach of the human. After 5 seconds, switch back to the green light and let the car return to normal driving.
當行人路上的紅外路障傳感器被觸發(有行人經過),智能紅綠燈將會進行智能轉換至紅燈,並控制車輛刹車。5秒後,再轉換回綠燈,並讓車輛回復正常行駛。
### Smart traffic light operation 智能交通燈運作     ## 8.3 Part List 材料準備
Microbit (1)
Expansion board 擴展板(1)
Distance sensor(1)
Obstacle Infrared avoidance sensor 紅外路障傳感器 (1)
Traffic light 交通燈 (1)
4-pin module wire PH2.0轉杜邦綫4P(1)
母對母杜邦綫 Female To Female Dupont Cable Jumper Wire Dupont Line (7)
M3*8mm screw (1)
M2*8mm screw (4)
M3 nut (1)
M2 nut (4)
螺絲批(1)
Module B (1)
Module E (1)
Module I(1)
## 8.4 Assembly step 組裝步驟 ### Step 1 第一步
On the basis of lesson7, attach the Traffic light Module to I1 model using M3*8 screw and nut.
在第七課的基礎下,用M3*8螺絲和螺母將交通燈模塊安裝到I1模型上。
 ### Step 2 第二步
Put the I1 model onto the I2 model. 把I1模型放到I2模型上。
 ### Step 3 第三步
Assembly completed! 組裝完成!
 ## 8.5 Hardware connect 硬件連接
Microbit 1:
Connect the Traffic light LED Module to P1 P2 P3 port
Connect obstacle Infrared avoidance sensor to P4 port
Connect the Distance Sensor to P15 (trig)/ P16 (echo) port
將交通LED模塊連接到 P1 P2 P3埠。
將紅外路障傳感器連接到P4端口。
將距離傳感器連接到P14(Trig)/P15(echo)端口。


Microbit2:
Car
## 8.6 Programming (MakeCode) 編程 ### Sender: ### Step 1. Set up a new function (TurnRed) 設置一個新的功能(TurnRed)。 + Snap pause to wait 1 second 暫停一秒 + Control traffic light yellow on + Snap pause to wait 1 second 暫停一秒 + Control traffic light red on   ### Step 2. Set up a new function (TurnGreen) 設置一个新的功能(TurnGreen)。 + Snap pause to wait 1 second 暫停一秒 + Control traffic light yellow on + Snap pause to wait 1 second 暫停一秒 + Control traffic light green on   ### Step 3. Disable micro:bit LED. 第一步 停用 micro:bit LED。 + Snap led enable false to on start 將積木啓用設爲false拖放到當啓動時 + Note that P3 is used as LED in default setting, LED need to be disable 注意,P3在默认设置中被用作LED,因此LED需要被禁用。   ### Step 4. Initialize the program similar as last lesson + Drag set variable trafficLight to Traffic light pin setting Red P0 Yellow P1 Green P2 to on start 將 trafficLight to Traffic light pin setting Red P0 Yellow P1 Green P2 拖入 當啓動時 + Control traffic light green on + Drag radio set group 6 to on start 將廣播群組設爲6拖入當啓動時     ### Step 5. Call function 呼叫函數 + Snap function TurnRed into if get motion (triggered or not) at pin P4 case 將呼叫TurnRed拖入get motion (triggered or not) at pin P4的如果句式中 + Drag function TurnGreen after the while loop 將呼叫TurnGreen 拖到循環后  
Full solution
https://makecode.microbit.org/_XEKU87ijgFY2
### Receiver: ### Step 1. Set radio set group at start position 在起始位置設置廣播群組 + Drag radio set group 6 to on start 將廣播群組設爲6拖入當啓動時 + Initially, the car moves forward by default   ### Step 2. Control car by receiving different number 通過接收不同數字來控制車輛 + Snap if statement into on radio received receivedNumber 將如果語句放入當收到廣播數字 receivedNumber + Set receivedNumber =1 and make the car stop 設receivedNumber =1,並控制刹車。 + Set receivedNumber=0 and make the car move forward 設receivedNumber=0,並讓車向前移動。  
Full solution:
https://makecode.microbit.org/_4hW5yAXg8f5T
https://makecode.microbit.org/_1o1iRhg3qfRF
## 8.7 Result 總結
On the basis of the last lesson, a traffic light module is added in this lesson.
在上一課的基礎下,增加一個紅綠燈模塊,當感應到有行人經過時,會先轉紅燈,再控制車輛刹車。之後,行人過完馬路,再控制交通燈轉綠燈及使車輛繼續向前行駛。
## 8.8 Think 思考
Q1. How can we add sound effects to the traffic LED Module according to the corresponding color?
我們怎樣才能根據相應的顏色為交通LED模塊添加聲音效果?