7. Lesson 7

7.1. Introduction
Welcome to Micro : bit Smart Car! In the lesson, we will explore Micro : bit, and learn how to control the Micro : bit Smart Car through programming.
7.2. Objective
Students will fully understand the theory, and the function of the Micro : bit of the AI lens in the Smart Car. Also, they will learn how to program the AI lens for achieving more functions of the Smart Car.
7.3. HuskyLens object tracking function
7.3.1. What is object tracking function?
The object tracking feature of Huskylens can learn and track a specific object. The basic principle of object tracking is to predict the action of the object through an empirical algorithm after learning and identifying the object, and track the part of the image sequence that matches the appearance feature information of the object. When the learned object appears in the camera image again, HuskyLens can recognize it and automatically track it. The more you learn about photos of the same object, the more accurate your identification will be.
7.3.2. Application of object tracking
7.3.2.1. Event detection
It can detect traffic events such as stopped vehicles, low-speed vehicles, wrong-way vehicles, pedestrians and smoke detection in the traffic flow, so as to take immediate response measures
7.3.2.2. Directing traffic
By detecting the number of passing vehicles, measuring the dead time, and providing the information to the traffic lights to improve the efficiency of traffic management at intersections
7.3.2.3. Human-computer interaction
By tracking human actions, machine learning can recognize and understand human actions, actions, human
7.3.2.4. Virtual Reality
By tracking and analyzing human movements, the actions of virtual characters can be simulated in a virtual environment, which can be used in games that capture the body movements of players, such as Xbox Kinnect and VR games
7.3.3. Huskylens’ object tracking
HuskyLens’s object tracking function can be divided into two parts: learning objects and tracking objects.
7.3.3.1. Learning objects
Aim the HuskyLens at the object to be tracked and adjust the distance between the object and the HuskyLens to include the object or a distinctive part in the orange box in the center of the screen. When the "Learn button" is pressed and held, the angle and distance are adjusted so that HuskyLens can learn the object from different angles and distances. During the learning process, the yellow box on the screen will be marked "Learning: ID1". When HuskyLens is able to track the object from different angles and distances, it will finish learning.
7.3.3.2. Tracking objects
Move HuskyLens or the target object, the box in the screen will automatically track the target object. When tracking the object, it will show "Learning: ID1", which means HuskyLens is learning while tracking the object, this setting helps to improve the ability of object tracking. When the recognition effect is objective, you can turn off the function of learning while tracking.
7.3.3.3. The method of turning off tracking and learning at the same time
In the object tracking mode, press and hold the "Function button", enter the secondary menu parameter setting. Find and select "Learning On", and then click the "Function button" to make the progress bar turn white, which means the function has been turned off. Finally, select "Save and Return" to exit the secondary menu.
7.4. Exercise 1
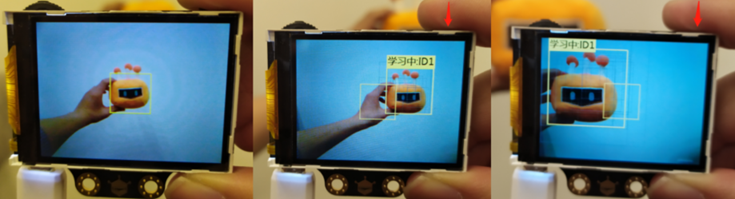
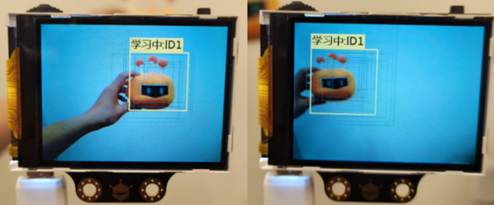
Let's get familiar with the object tracking function. Make any kind of gesture (refer to the picture below) and use HuskyLens to learn from different angles and distances.
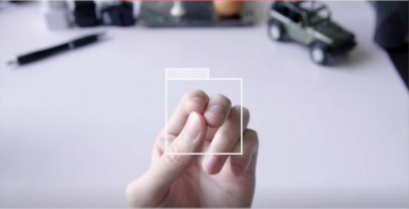
After learning, maintain the gesture and move the hand to different distances and positions on the screen to observe the effect of object tracking. Then, try to switch to different gestures, and then replay the original gesture until HuskyLens can recognize and continue tracking again.
7.5. Exercise 2
Design a program. After learning an object, the car will always face the object as long as it is on the screen.
Tip:
Use “pause” blocks to control how long the car takes to turn in each direction
Use the X center to represent the object position

7.6. Exercise 3
Achieve obstacle detection with HuskyLens object tracking. Learn an object and place it directly in front of the car. When the HuskyLens detects the object, the car moves forward and brakes before colliding with the object, without using the ultrasonic sensor. After the object is out of the way, the car moves forward again.
***** Turn off the function of tracking and learning at the same time, otherwise when the car is close to the object, HuskyLens will learn the surrounding objects together, causing misjudgment.
Tip:
How do we usually know if we are near an object by our eyes?
The learning frame of HuskyLens object tracking is preset to 70*70 square units.
Learning objects at longer distances is more effective
7.7. Exercise 4
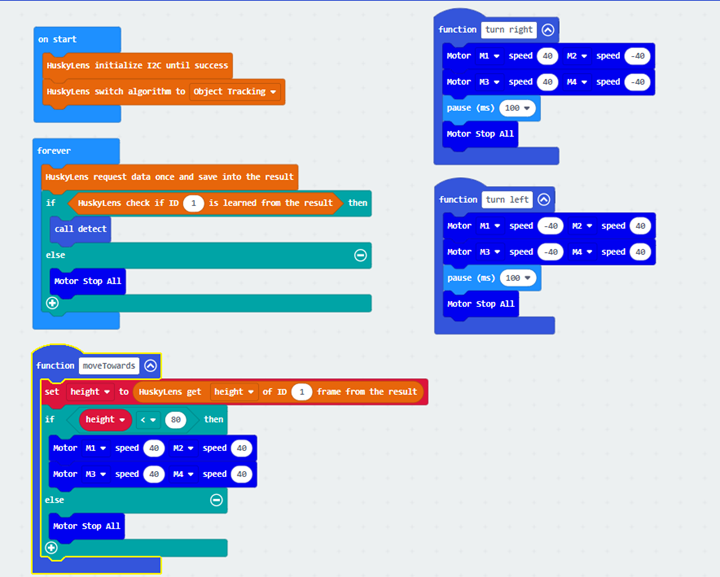
Combine the contents of Exercise 2 and Exercise 3 to design the program. After learning an object at a distance using HuskyLens, reverse the direction of the car and let the car find the object automatically. When the object is detected on the screen, the car faces and moves towards the object until it stops when it is close.(The following patterns can be used for objects)

7.8. Answer
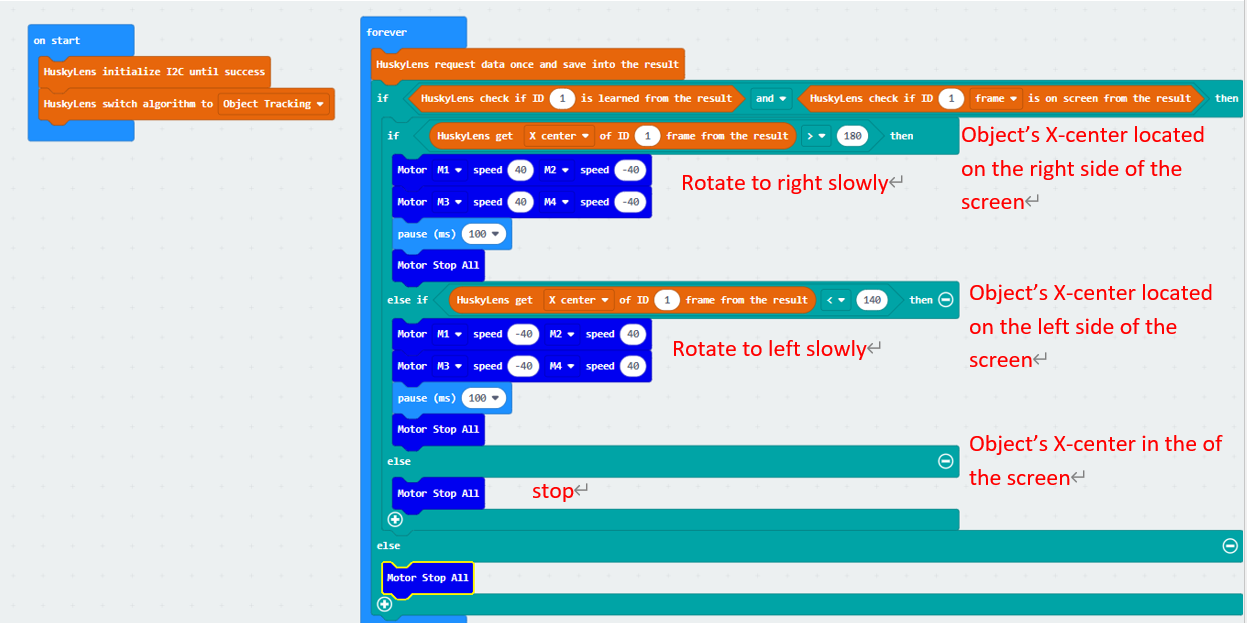
7.8.1. Exercise 2
When the X center of an object has been learned.:
When it is greater than 180, the car turns right for 100 milliseconds and stops.
When it is less than 140, the car turn left for 100 milliseconds and stop.
Otherwise stop the car.
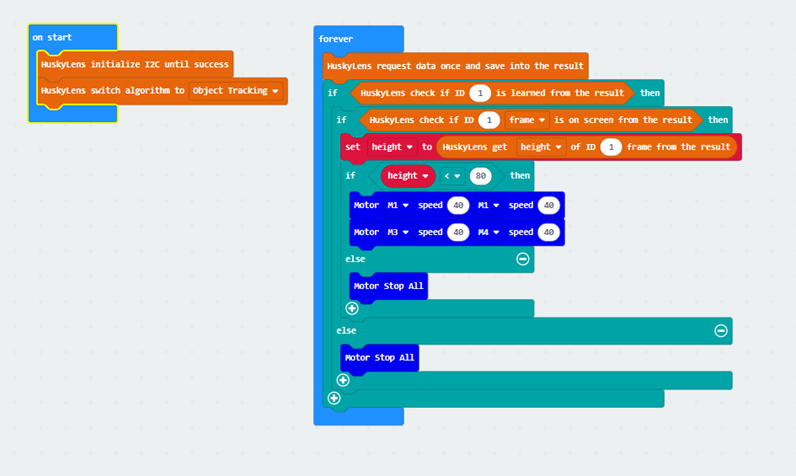
7.8.2. Exercise 3
In everyday life, as you get closer to an object, it looks bigger.
In general, we can judge the distance of an object by its height and width.
Set an area which larger than the study box, e.g. 80 (this distance will be affected by the distance at the time of study)
When the object is in the screen and the height of the object is less than 80 units, the car moves forward, otherwise stop the car.
7.8.3. Exercise 4
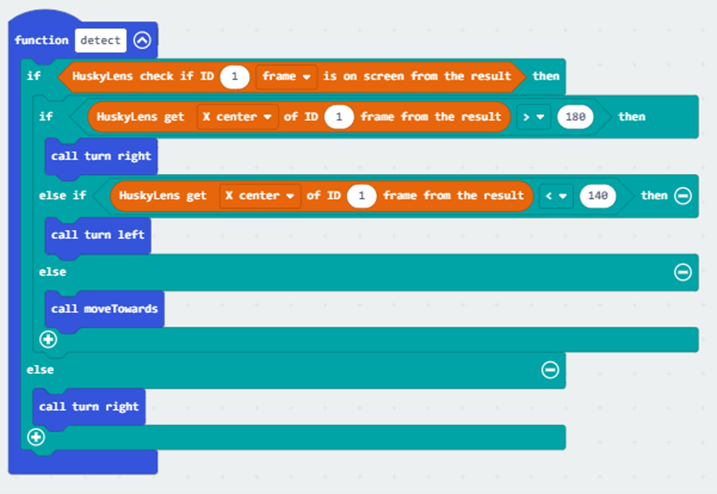
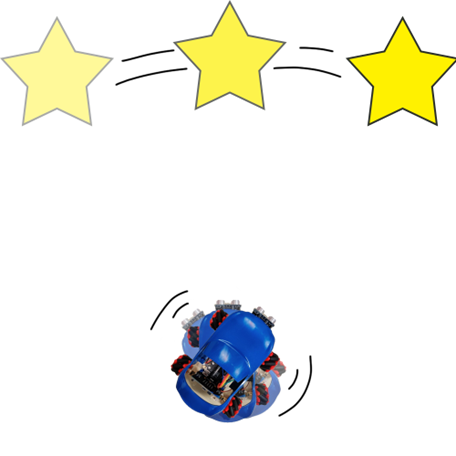
After the program is started, the car keeps rotating until HuskyLens detects the object in the screen.
Then the car continues to rotate until the object's X position is adjusted to near the center of the screen.
Finally, the car moves forward until the height of the object accounts for more than 80 of the HuskyLens screen and then stops.